I designed a less ugly iPhone dock
I’ve had a MagSafe charger and Apple Watch charger on my bedside table for a long time, and I decided I was ready to find a setup that made it look less like a rats nest of cables.
After looking at all the options on the market, I realized I wasn’t comfortable spending $70-$150 for a charging hub that would only be useful for a couple of devices on my night stand.
(For those of you just looking for the STL, it's here)
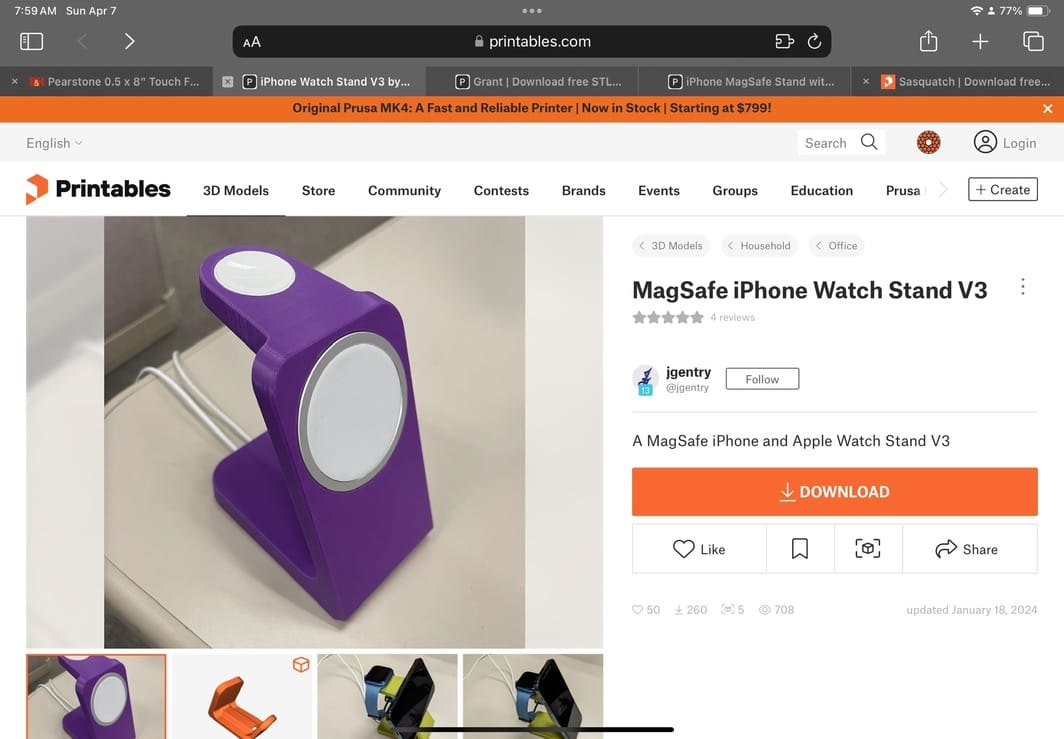
Existing options on the market
These are the types of products I was bumping into when I started looking for a charger for my iPhone and Apple Watch.
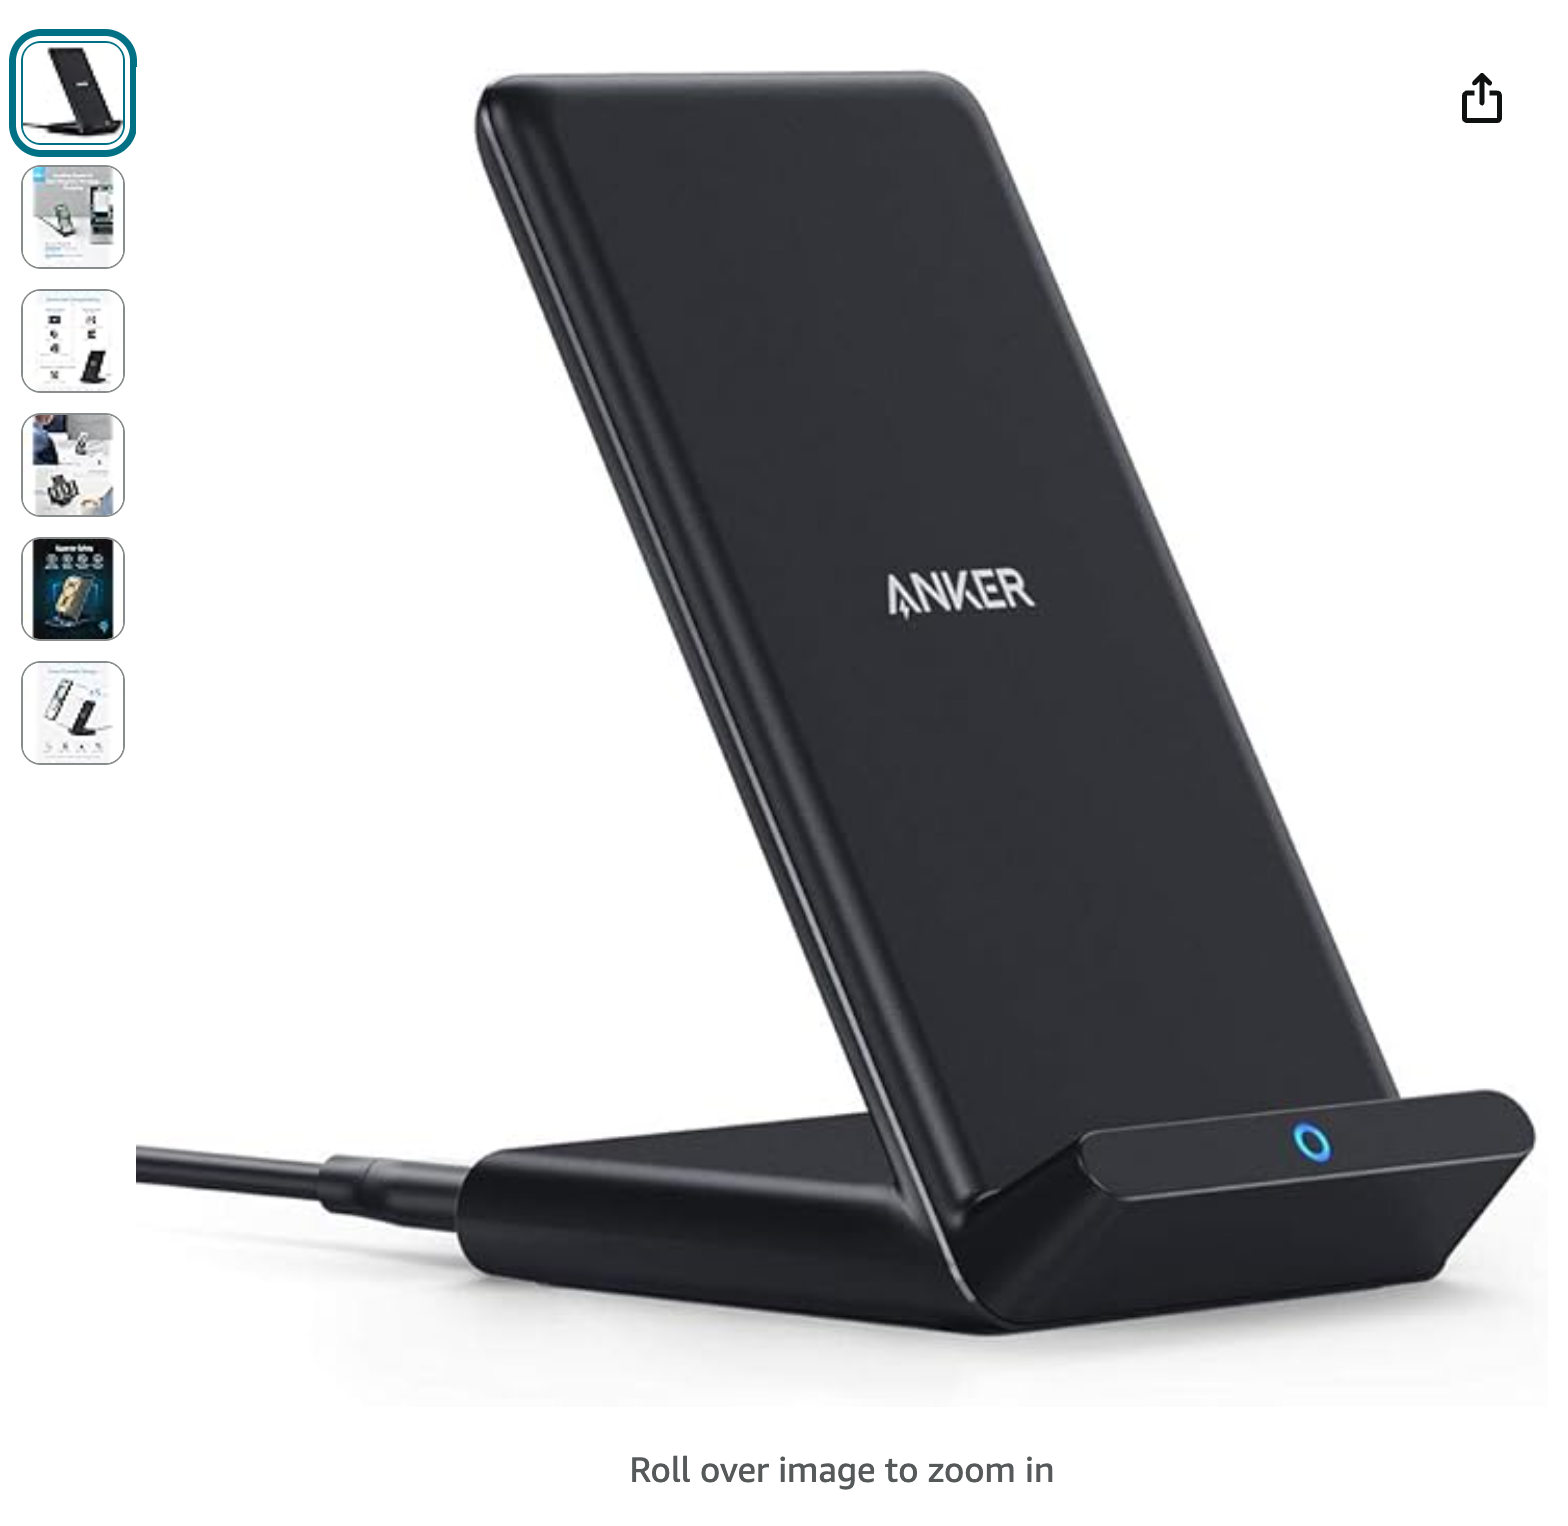
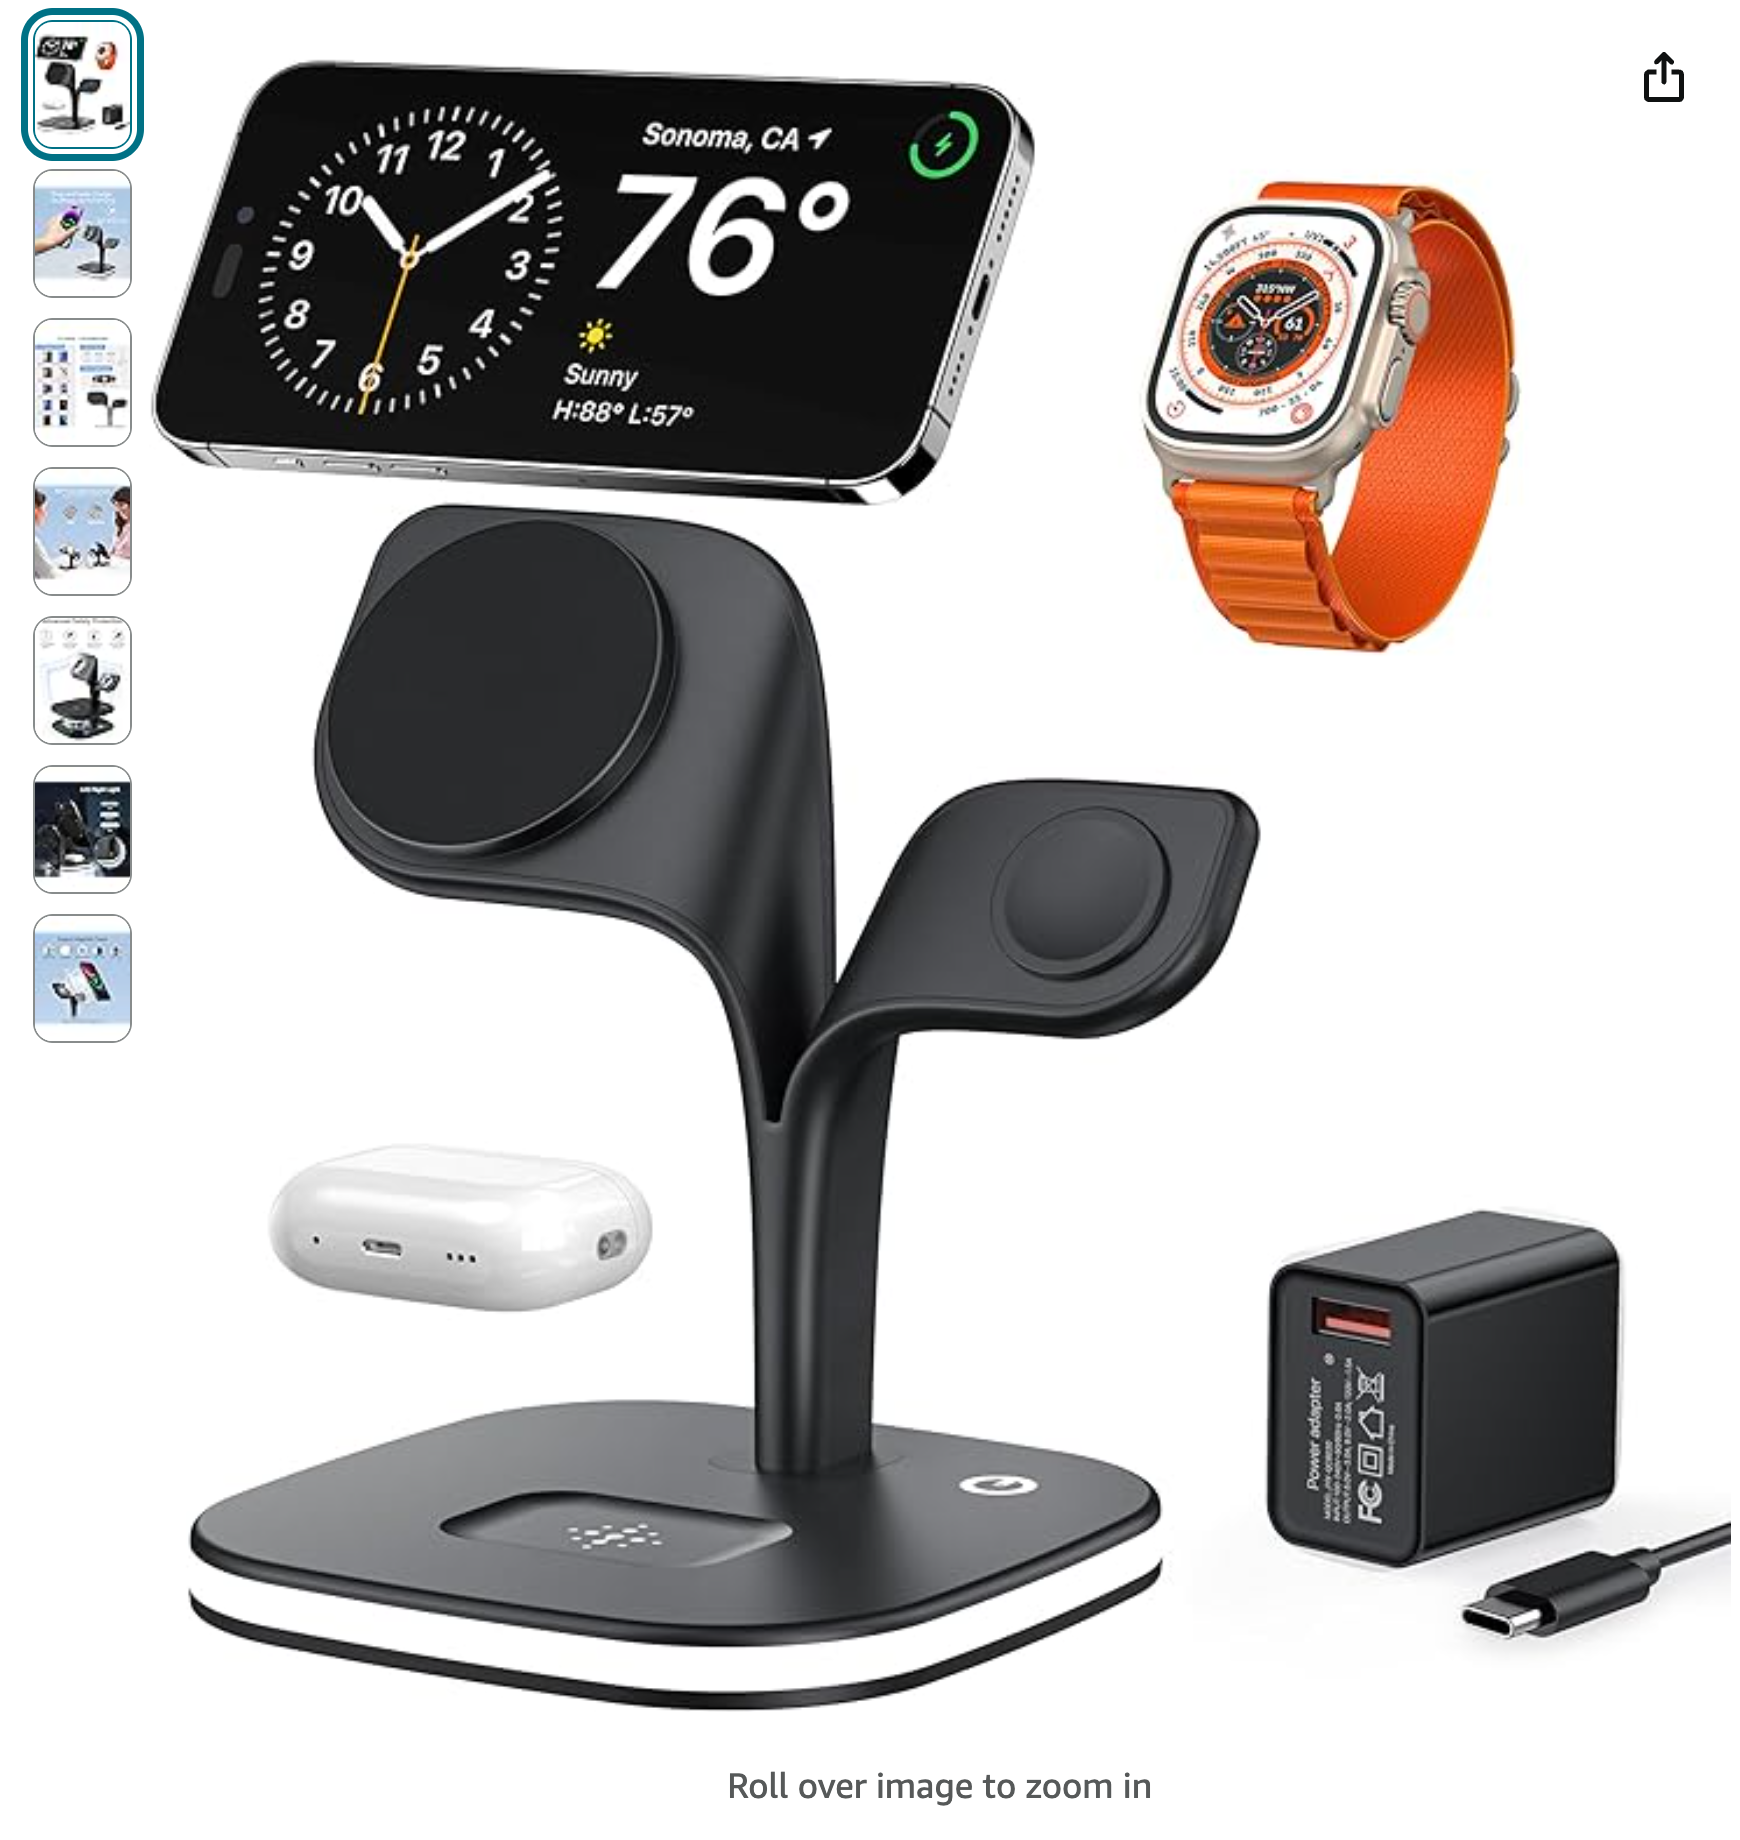
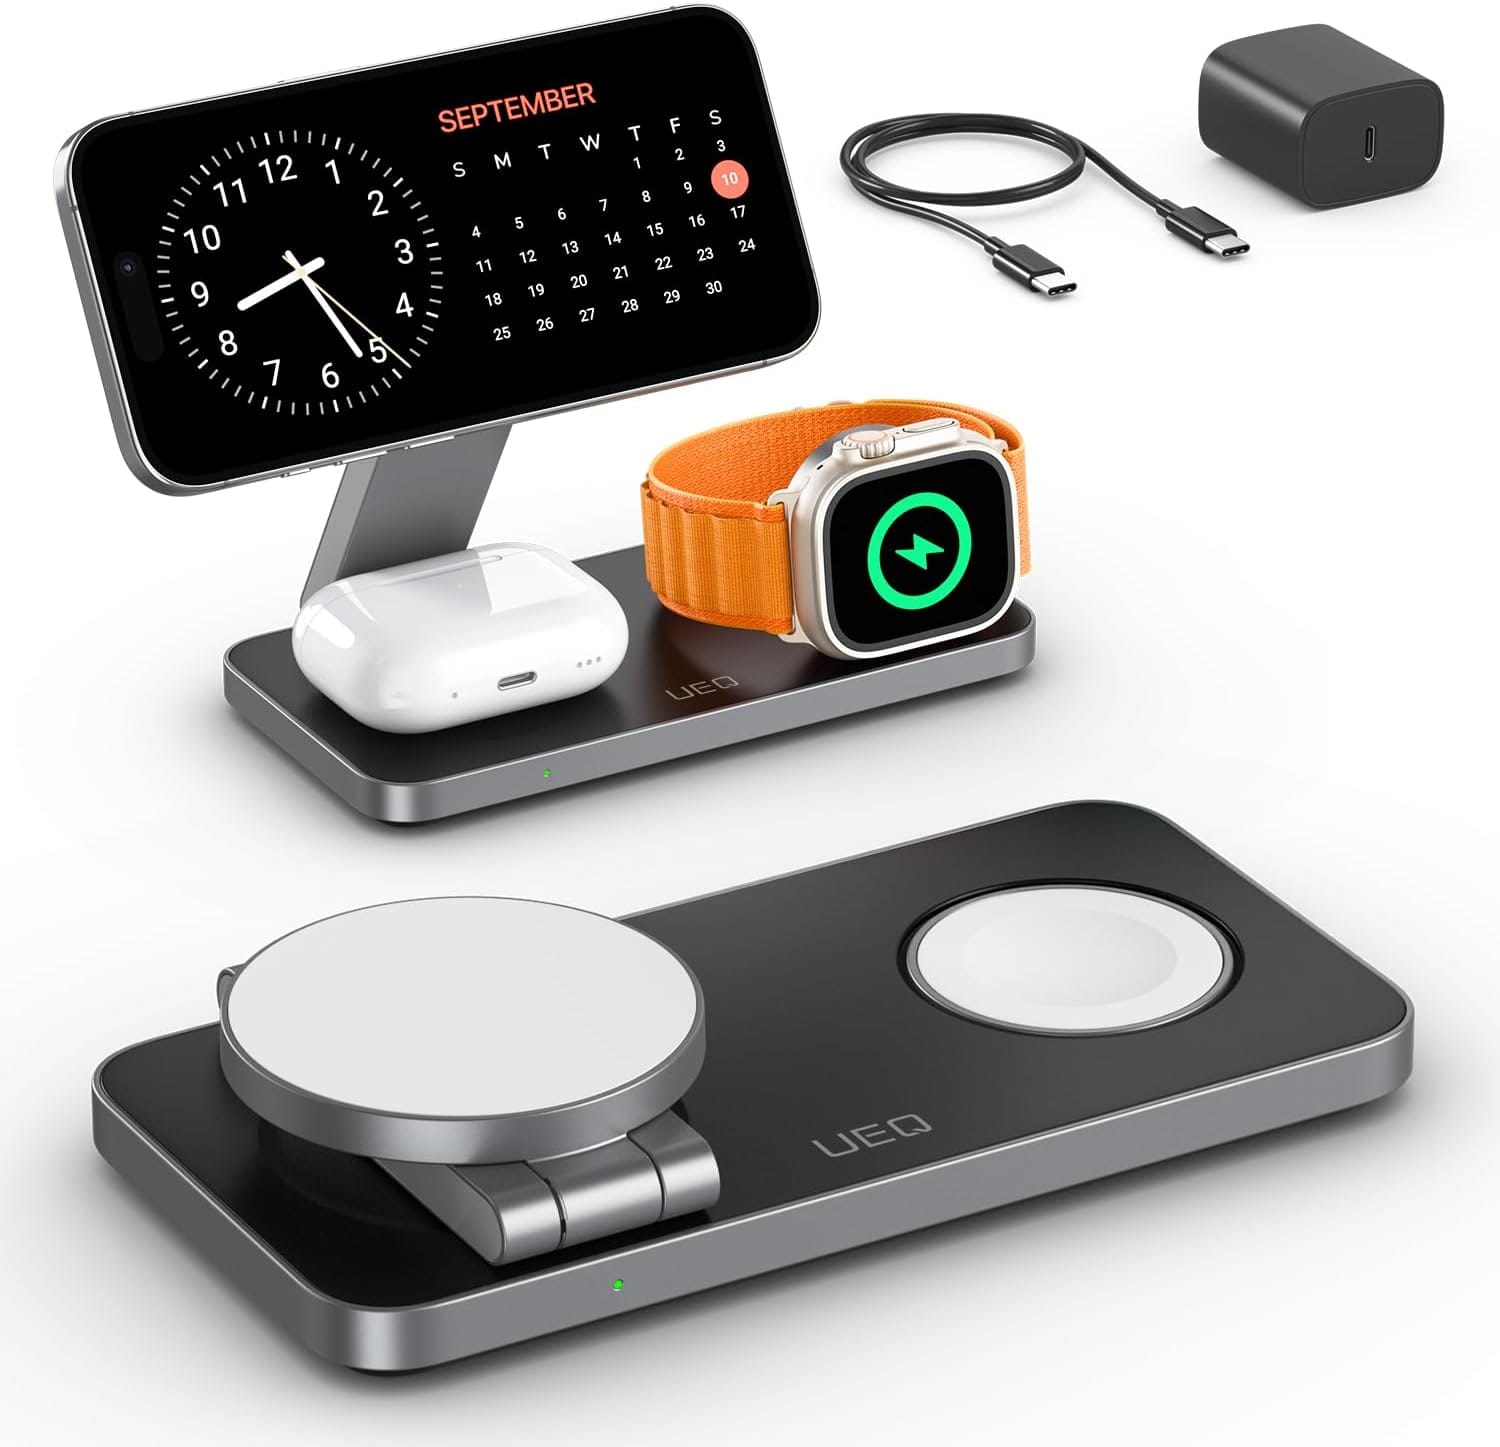
They are all large and take up a lot of space horizontally or vertically. They’re all dark colors that really stick out on a nightstand.
So then I started to look at 3D print files, I found things that were closer to what I wanted, but they all felt overbuilt and too chunky.
Design my own
When I sat down and thought about what I wanted, these are the elements that came to mind:
- No clutter - the new stand should have built in cable management
- Small footprint - I didn’t want the stand to take up too much space
- Didn’t want it to look ridiculous when empty
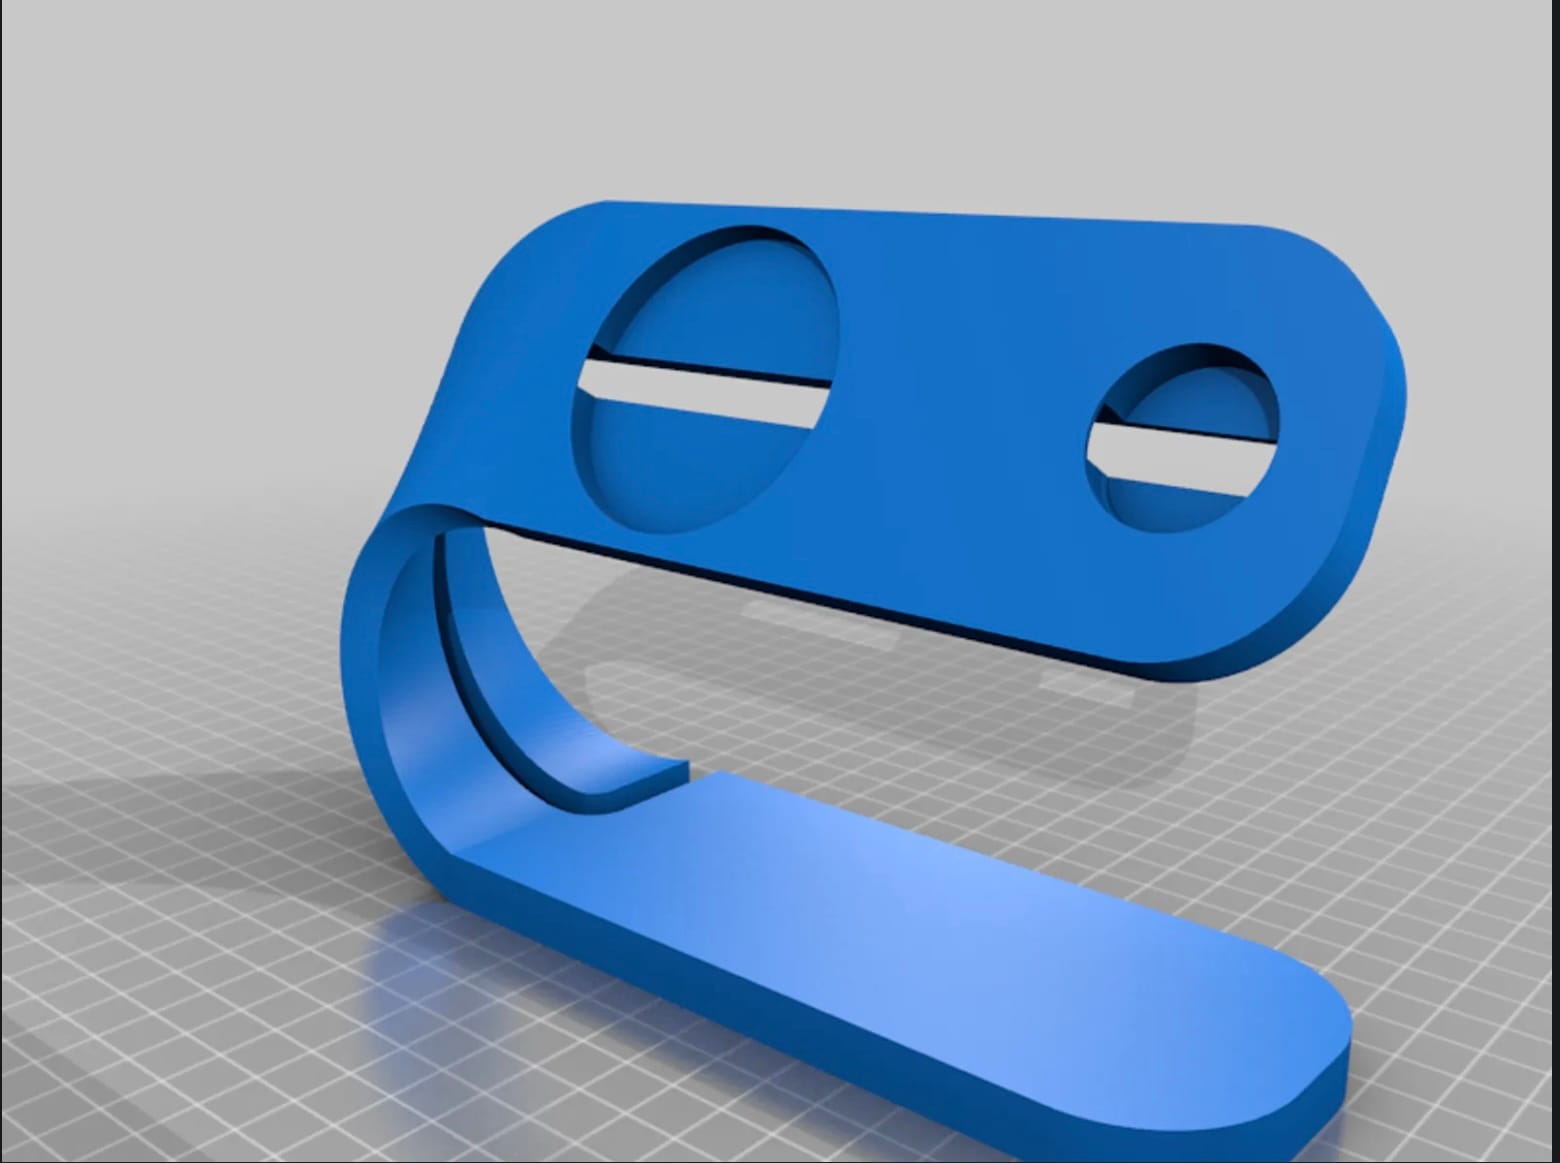
I took the 3D print file that was the closest to my idea, then added my design suggestions to that image, and sent those to a 3D designer I found on Fiverr.
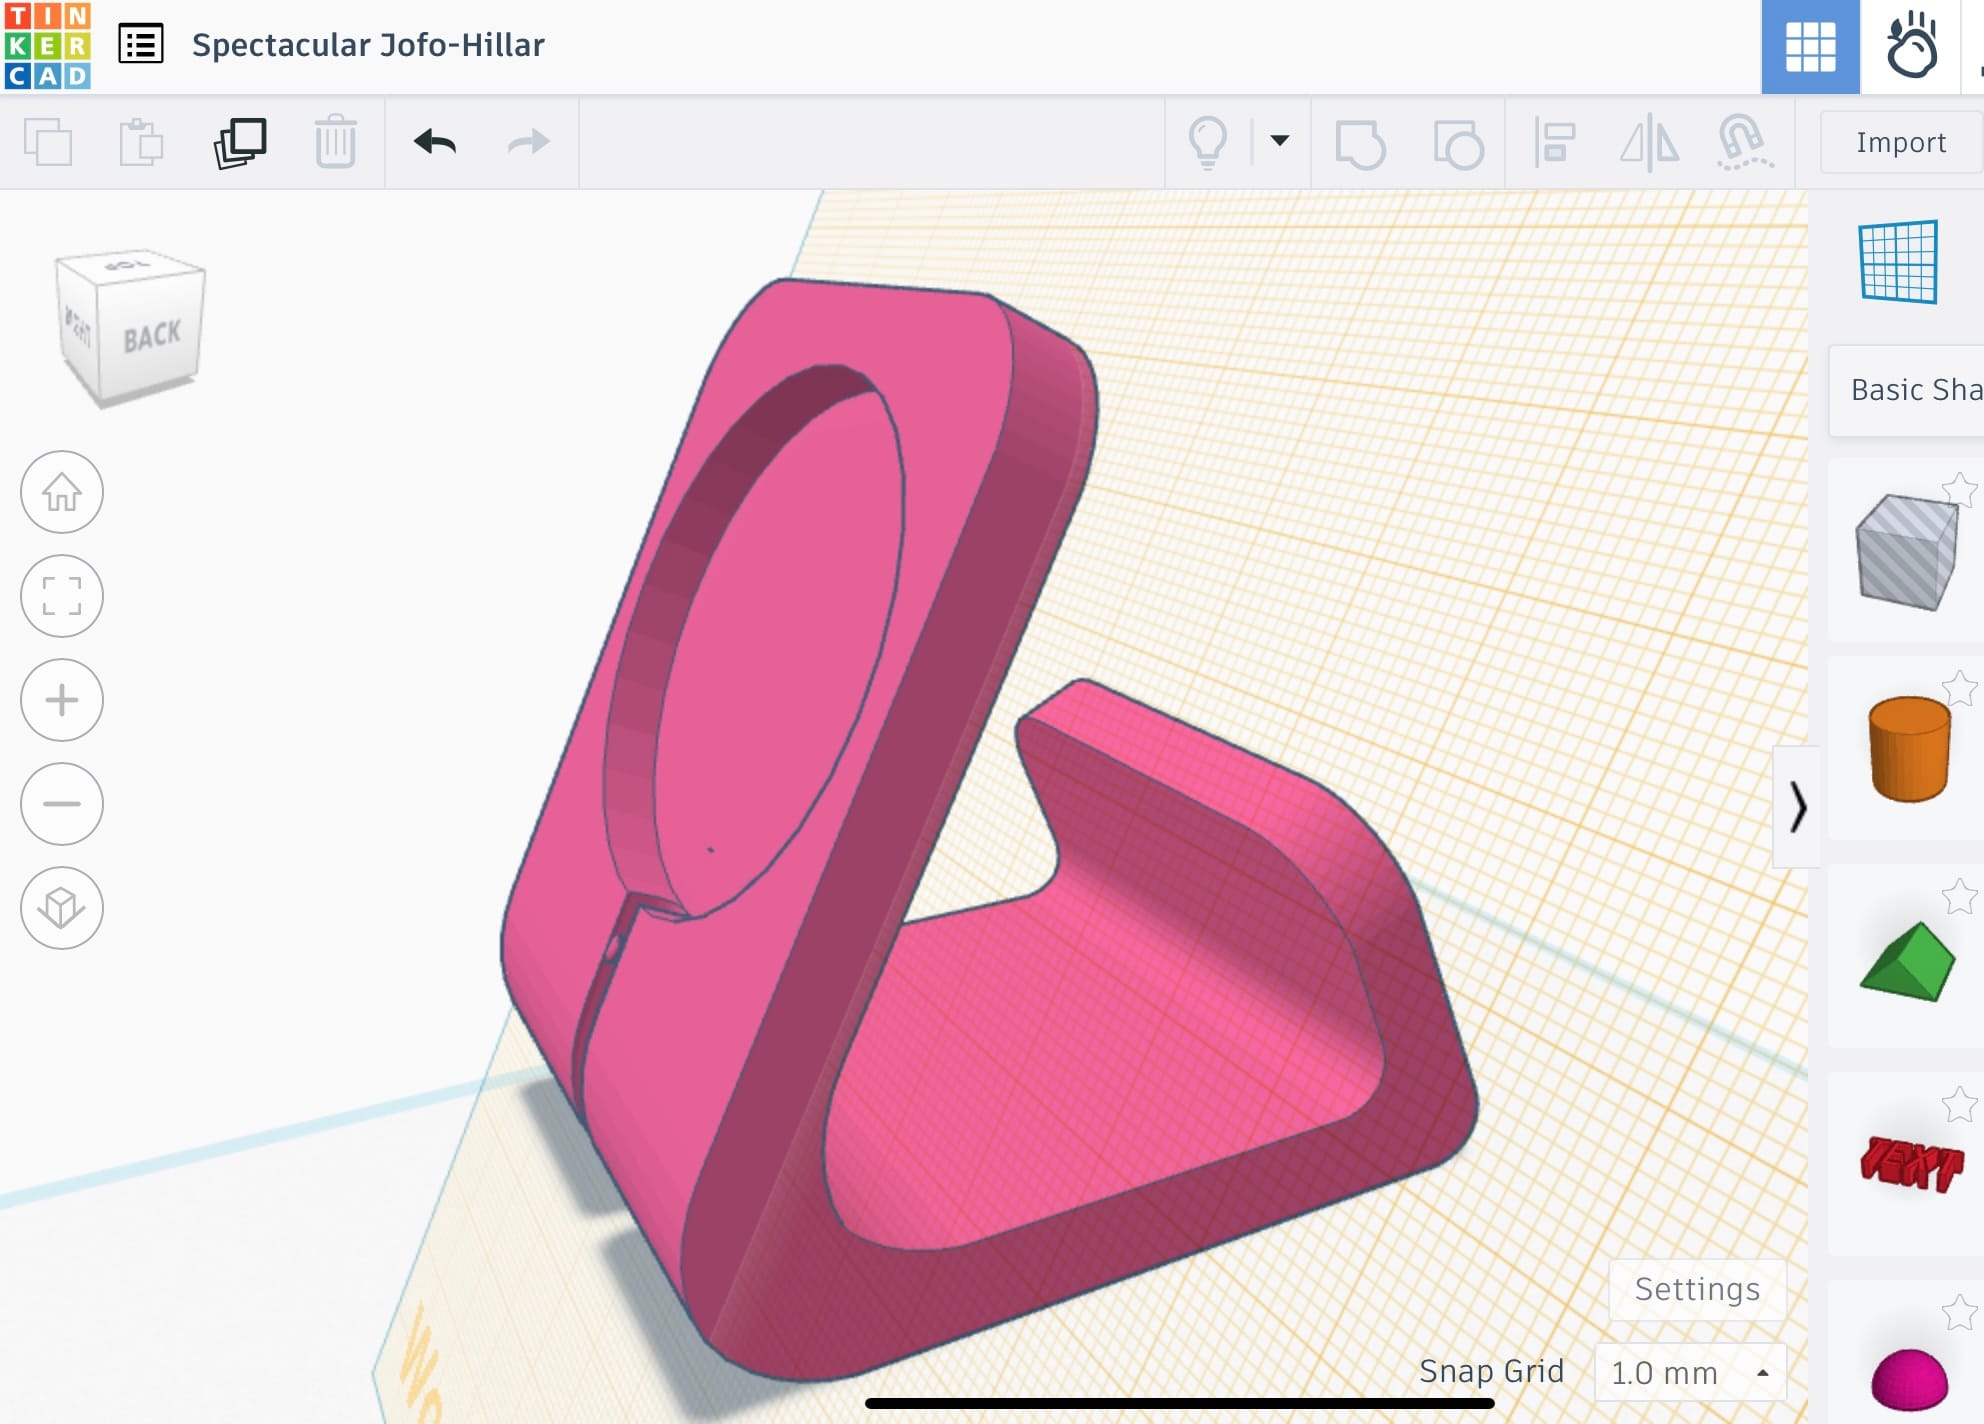
I got this design back, which I loved, and then sent it to Treatstock to get printed, since I don’t own a 3D printer.
Iterations
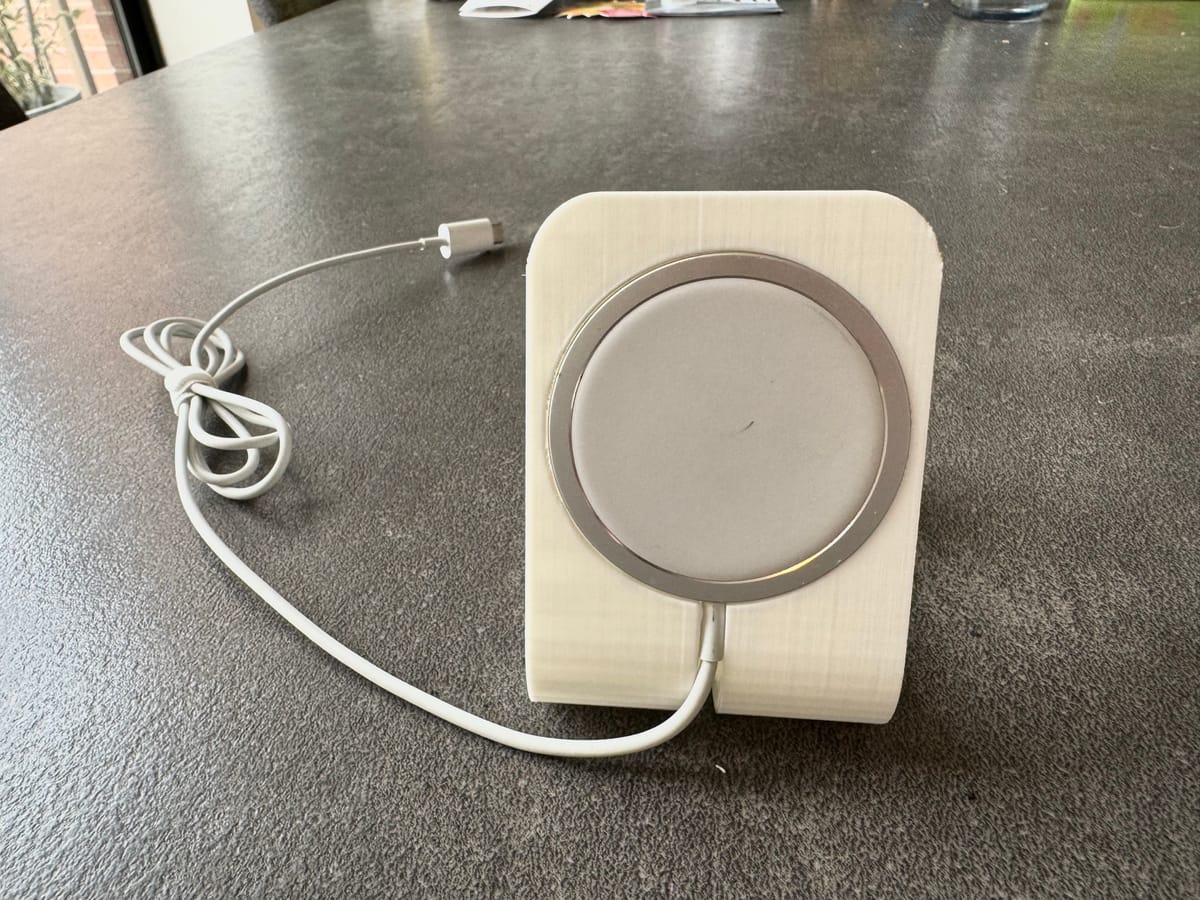
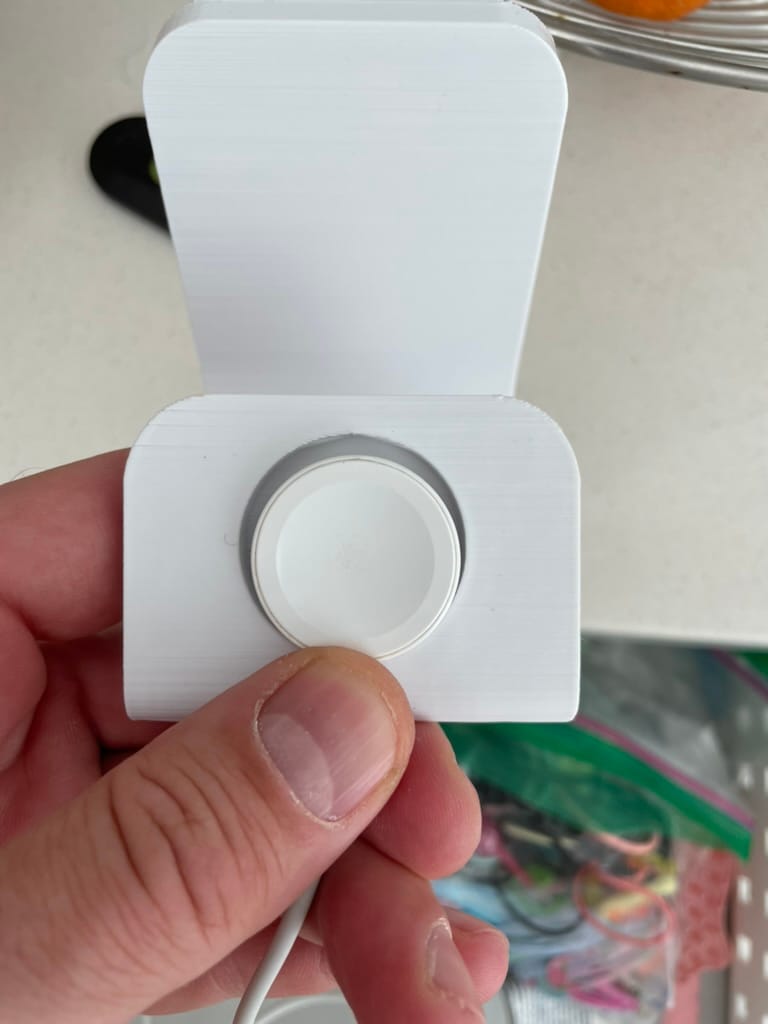
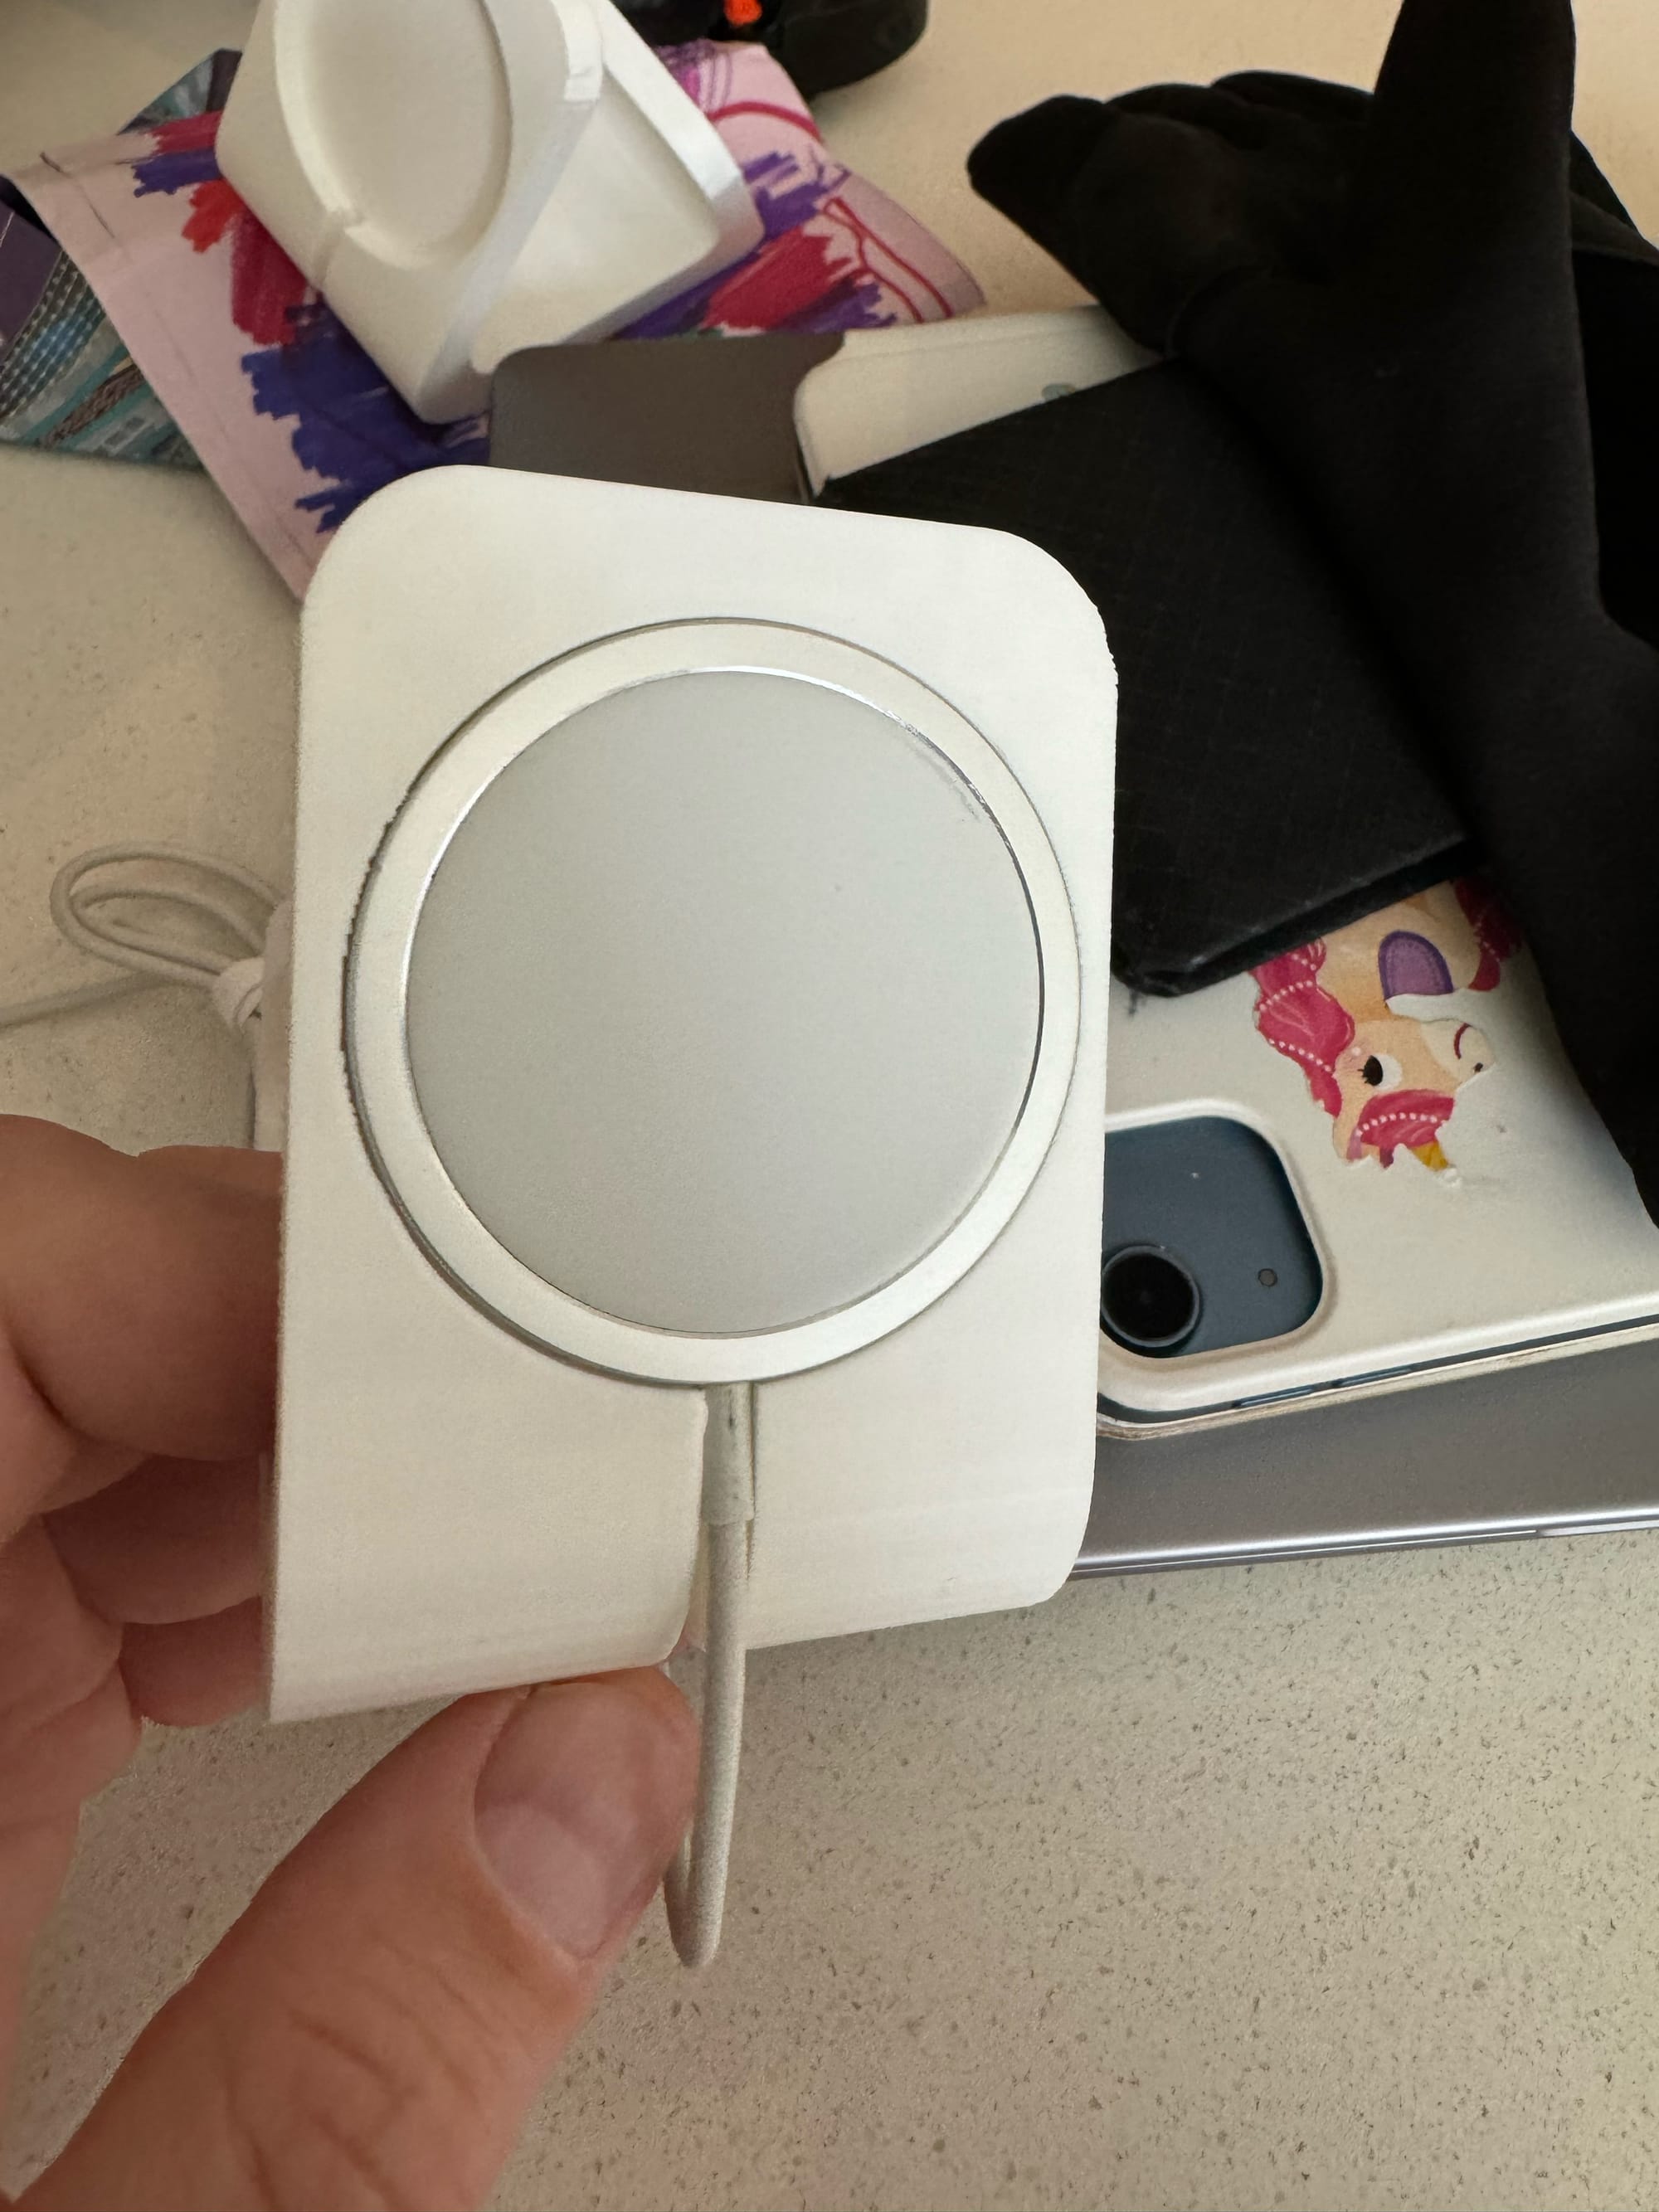
This is v1 of what I got back, and I was thrilled. I couldn’t believe that the measurements worked and the magsafe chargers fit perfectly in the cut-outs. I also thought the looked fantastic on my night stand. Sure, it was a bit longer than I needed, but I could sense the potential in the design.
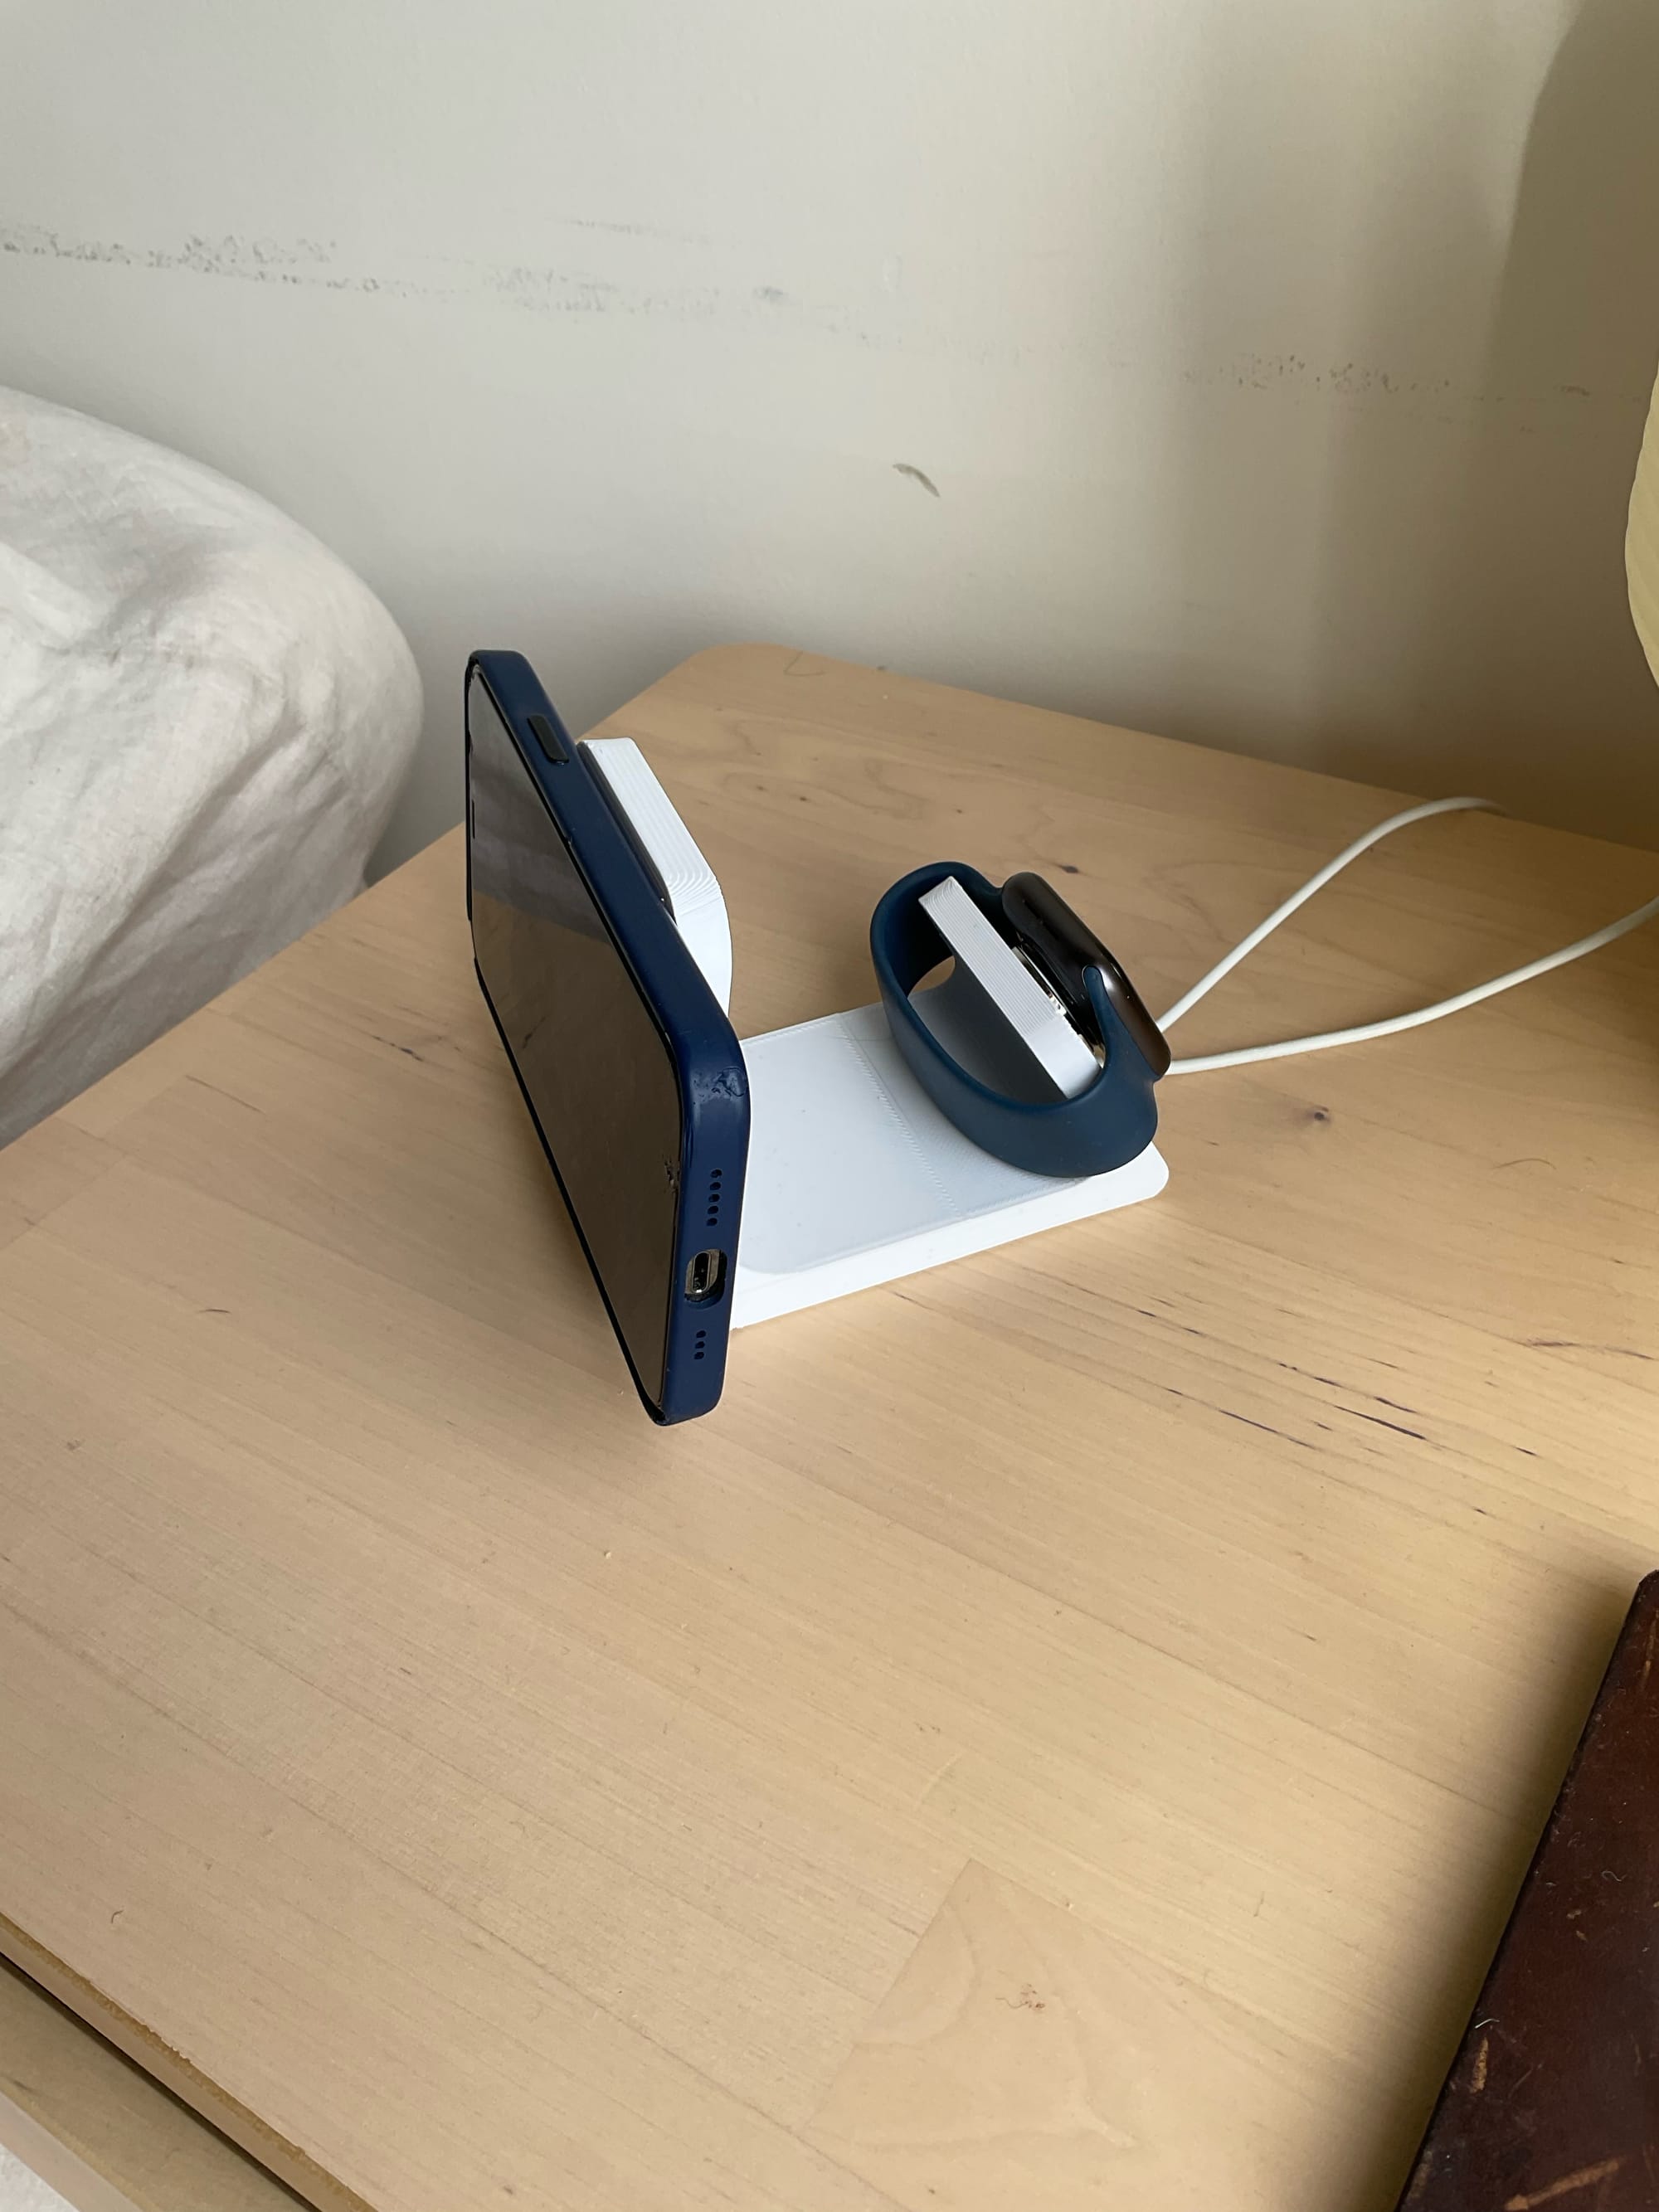
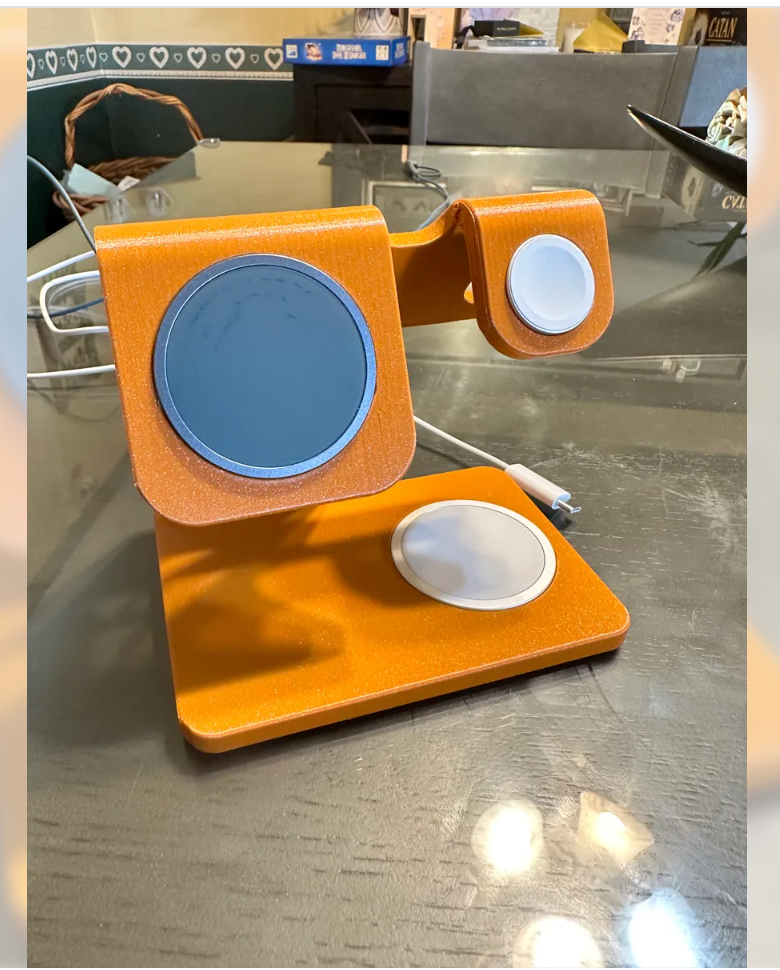
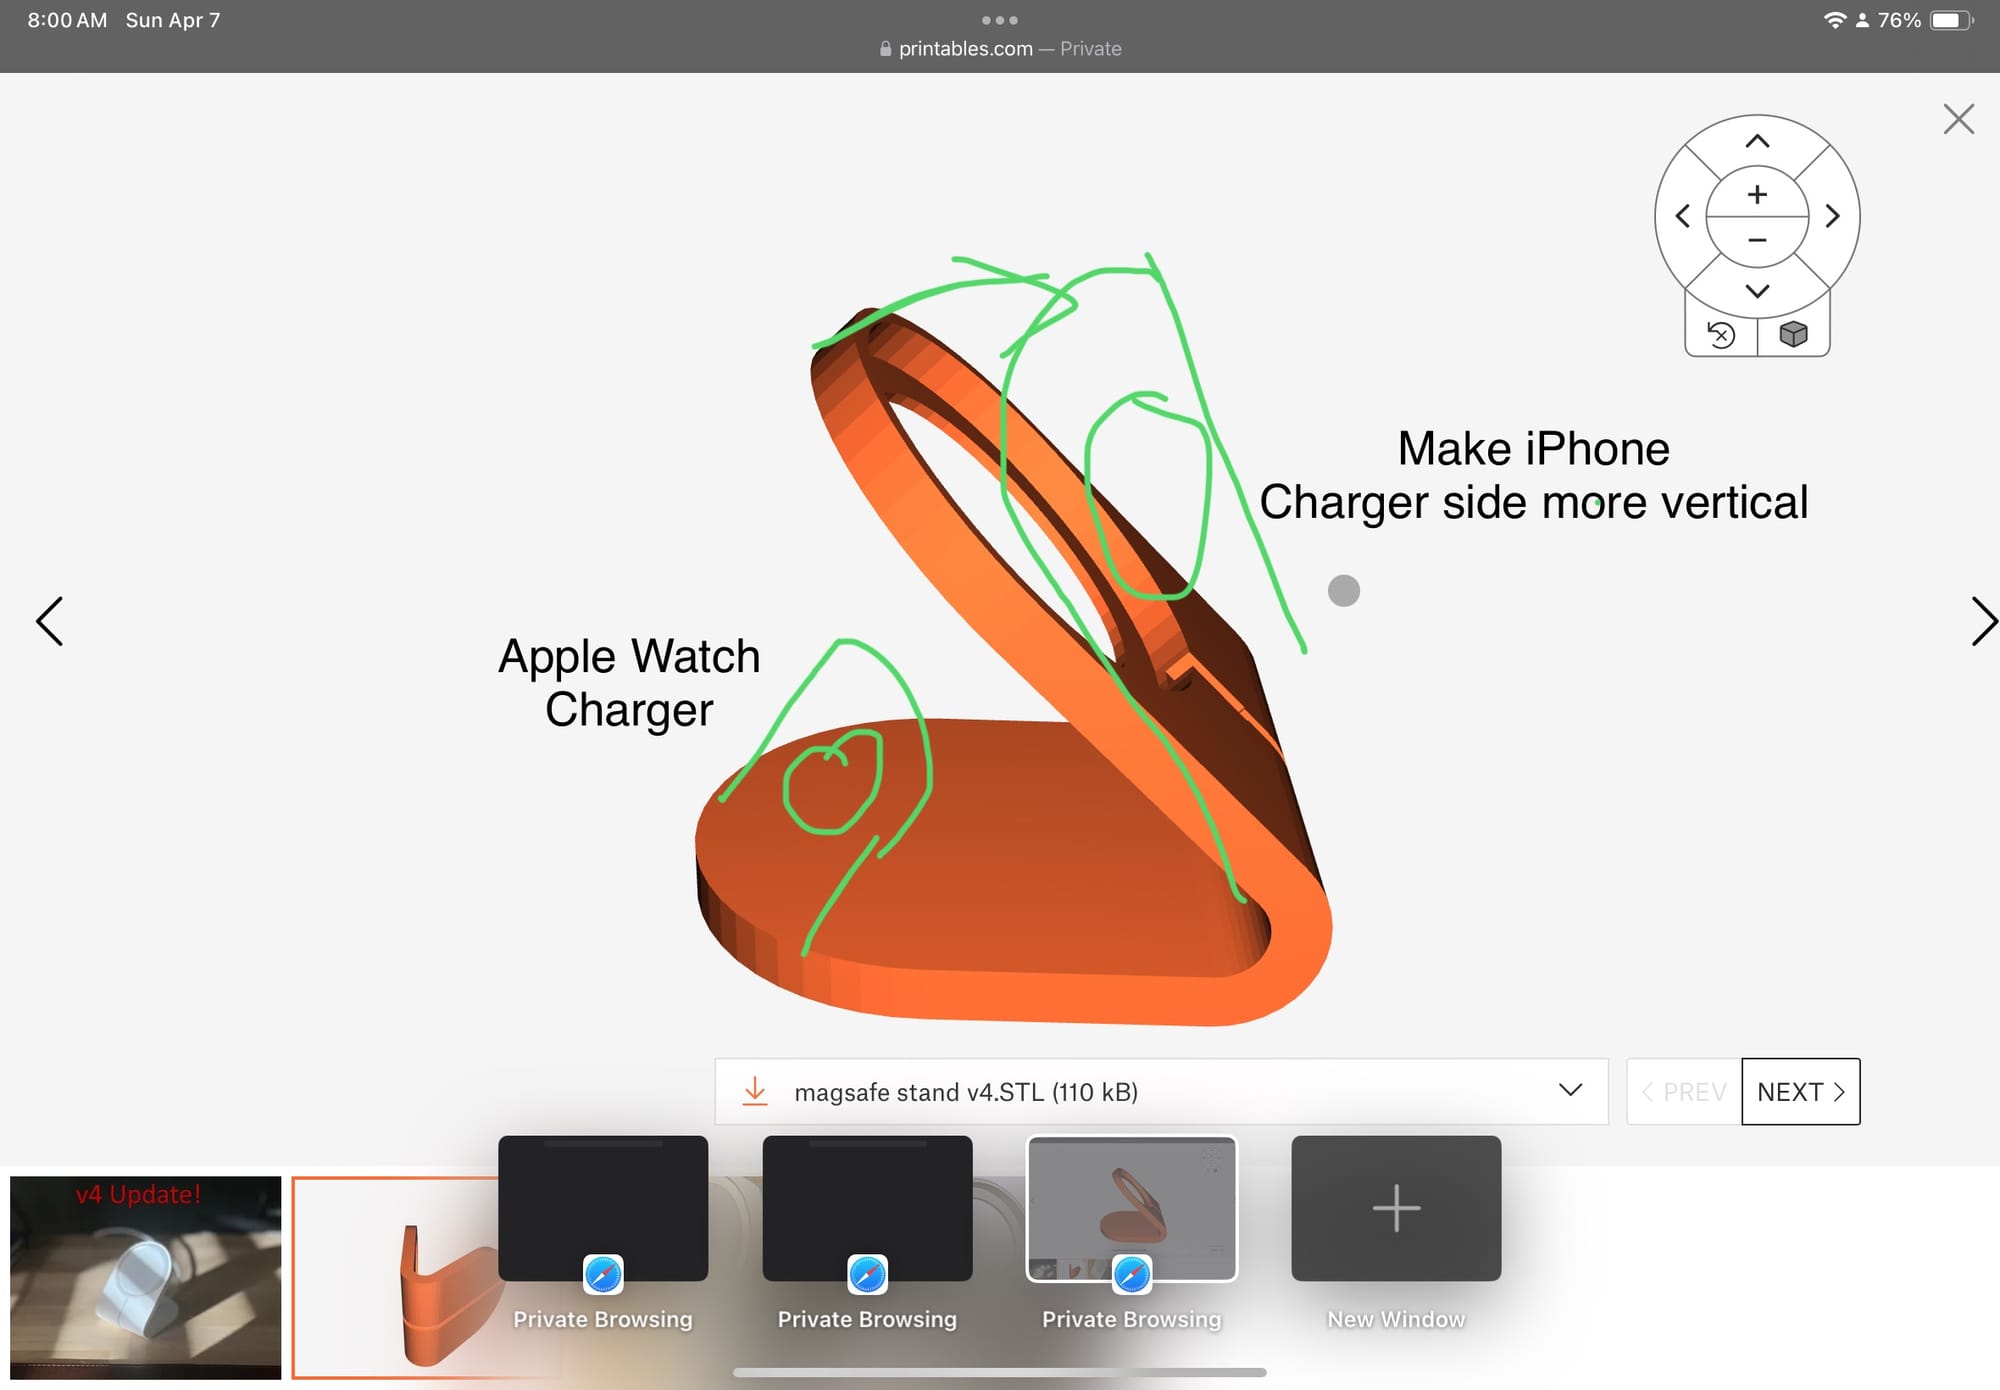
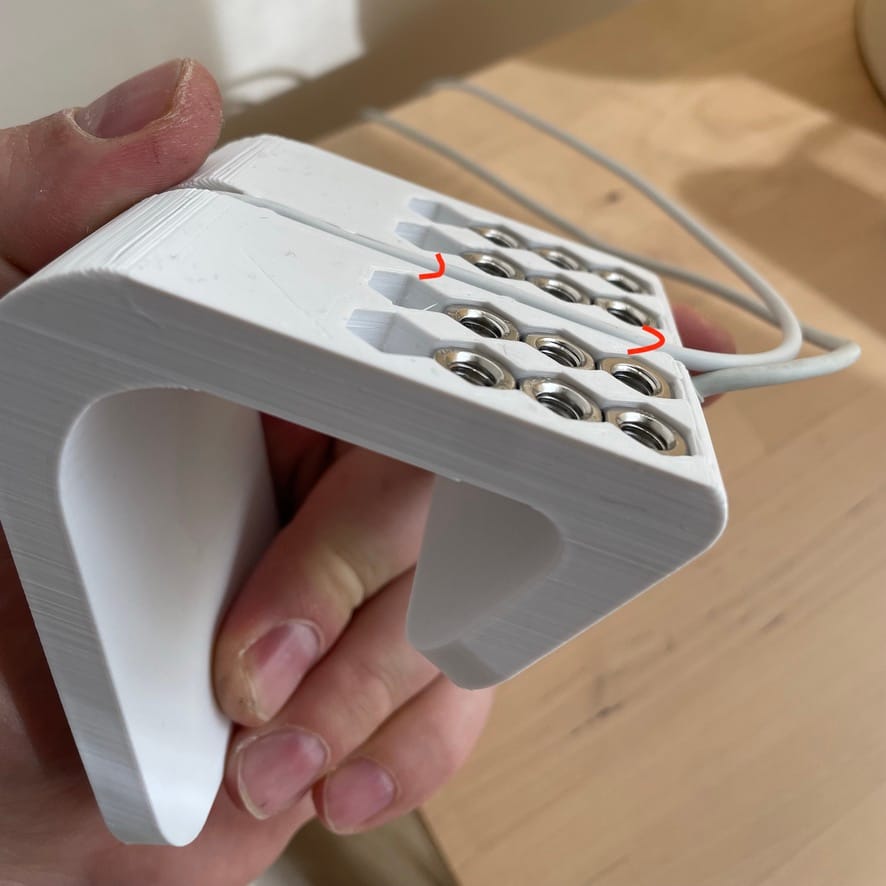
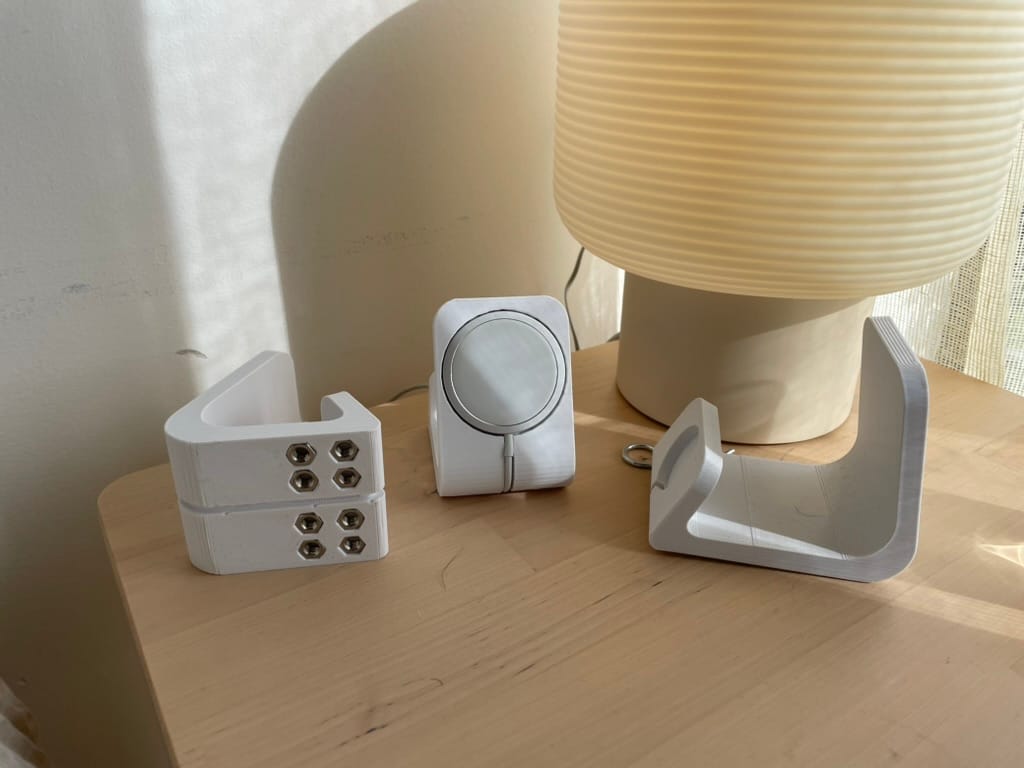
In subsequent versions, I worked with the designer to add carve-outs for cables, and then cutouts for adding weights / nuts in the bottom to keep the stand from tipping forward when the iPhone was on the front.
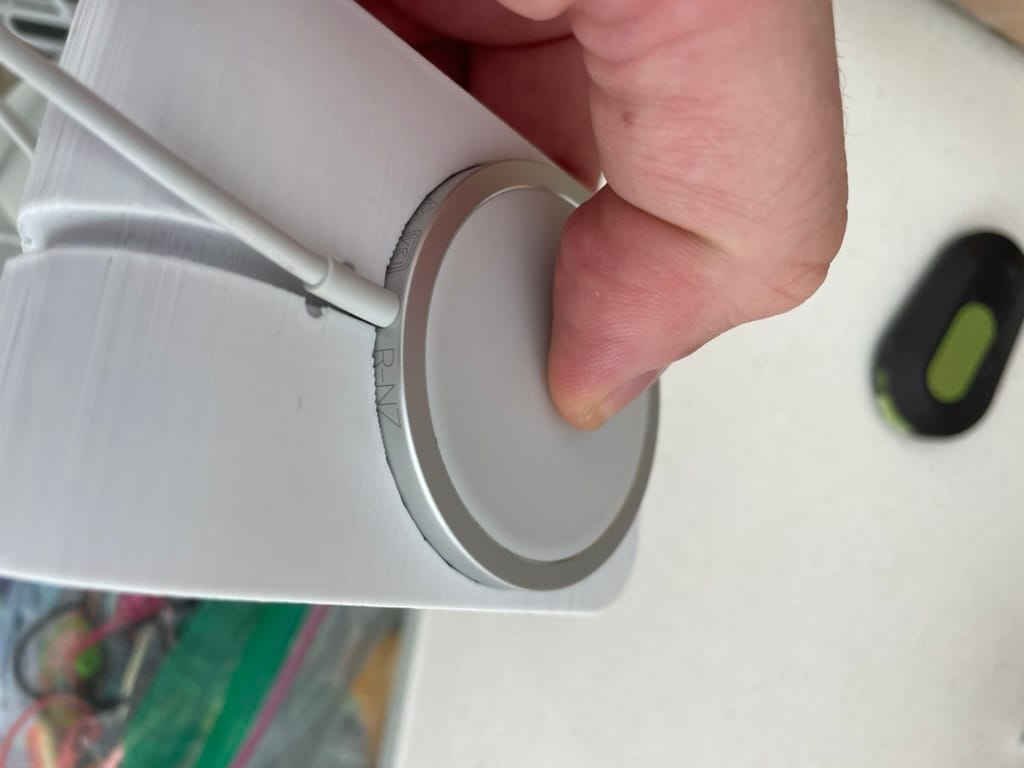
Then, the trouble started. For some reason, the cut-outs for the chargers came back too small for either charging puck to fit. They worked just fine in the first versions of the stand I printed, but not in the later versions, even though the dimensions were the same. This makes me wonder whether the issue is on the printing side.
Lessons Learned
These will be super obvious to anyone who’s done some 3D printing, but here are the lessons that I learned the hard way as a beginner.
1) 3D print networks can be cost-effective
I’ve been using Treatstock, and I’ve been pleasantly surprised with the speed, quality and price. For this build, using Treatstock has ranged from $10 to $15 per print, including shipping. Had I been better with my measurements, I wouldn't have needed more than 4 prototypes. My total project cost would have been in the 40-$60, which is on the low end of the cost of many of the stands that I saw on amazon. If I wanted more than one stand, then my cost per unit drops rapidly from there. Obviously, if you’re just printing an existing design and not making your own, then it’s even more cost-effective.
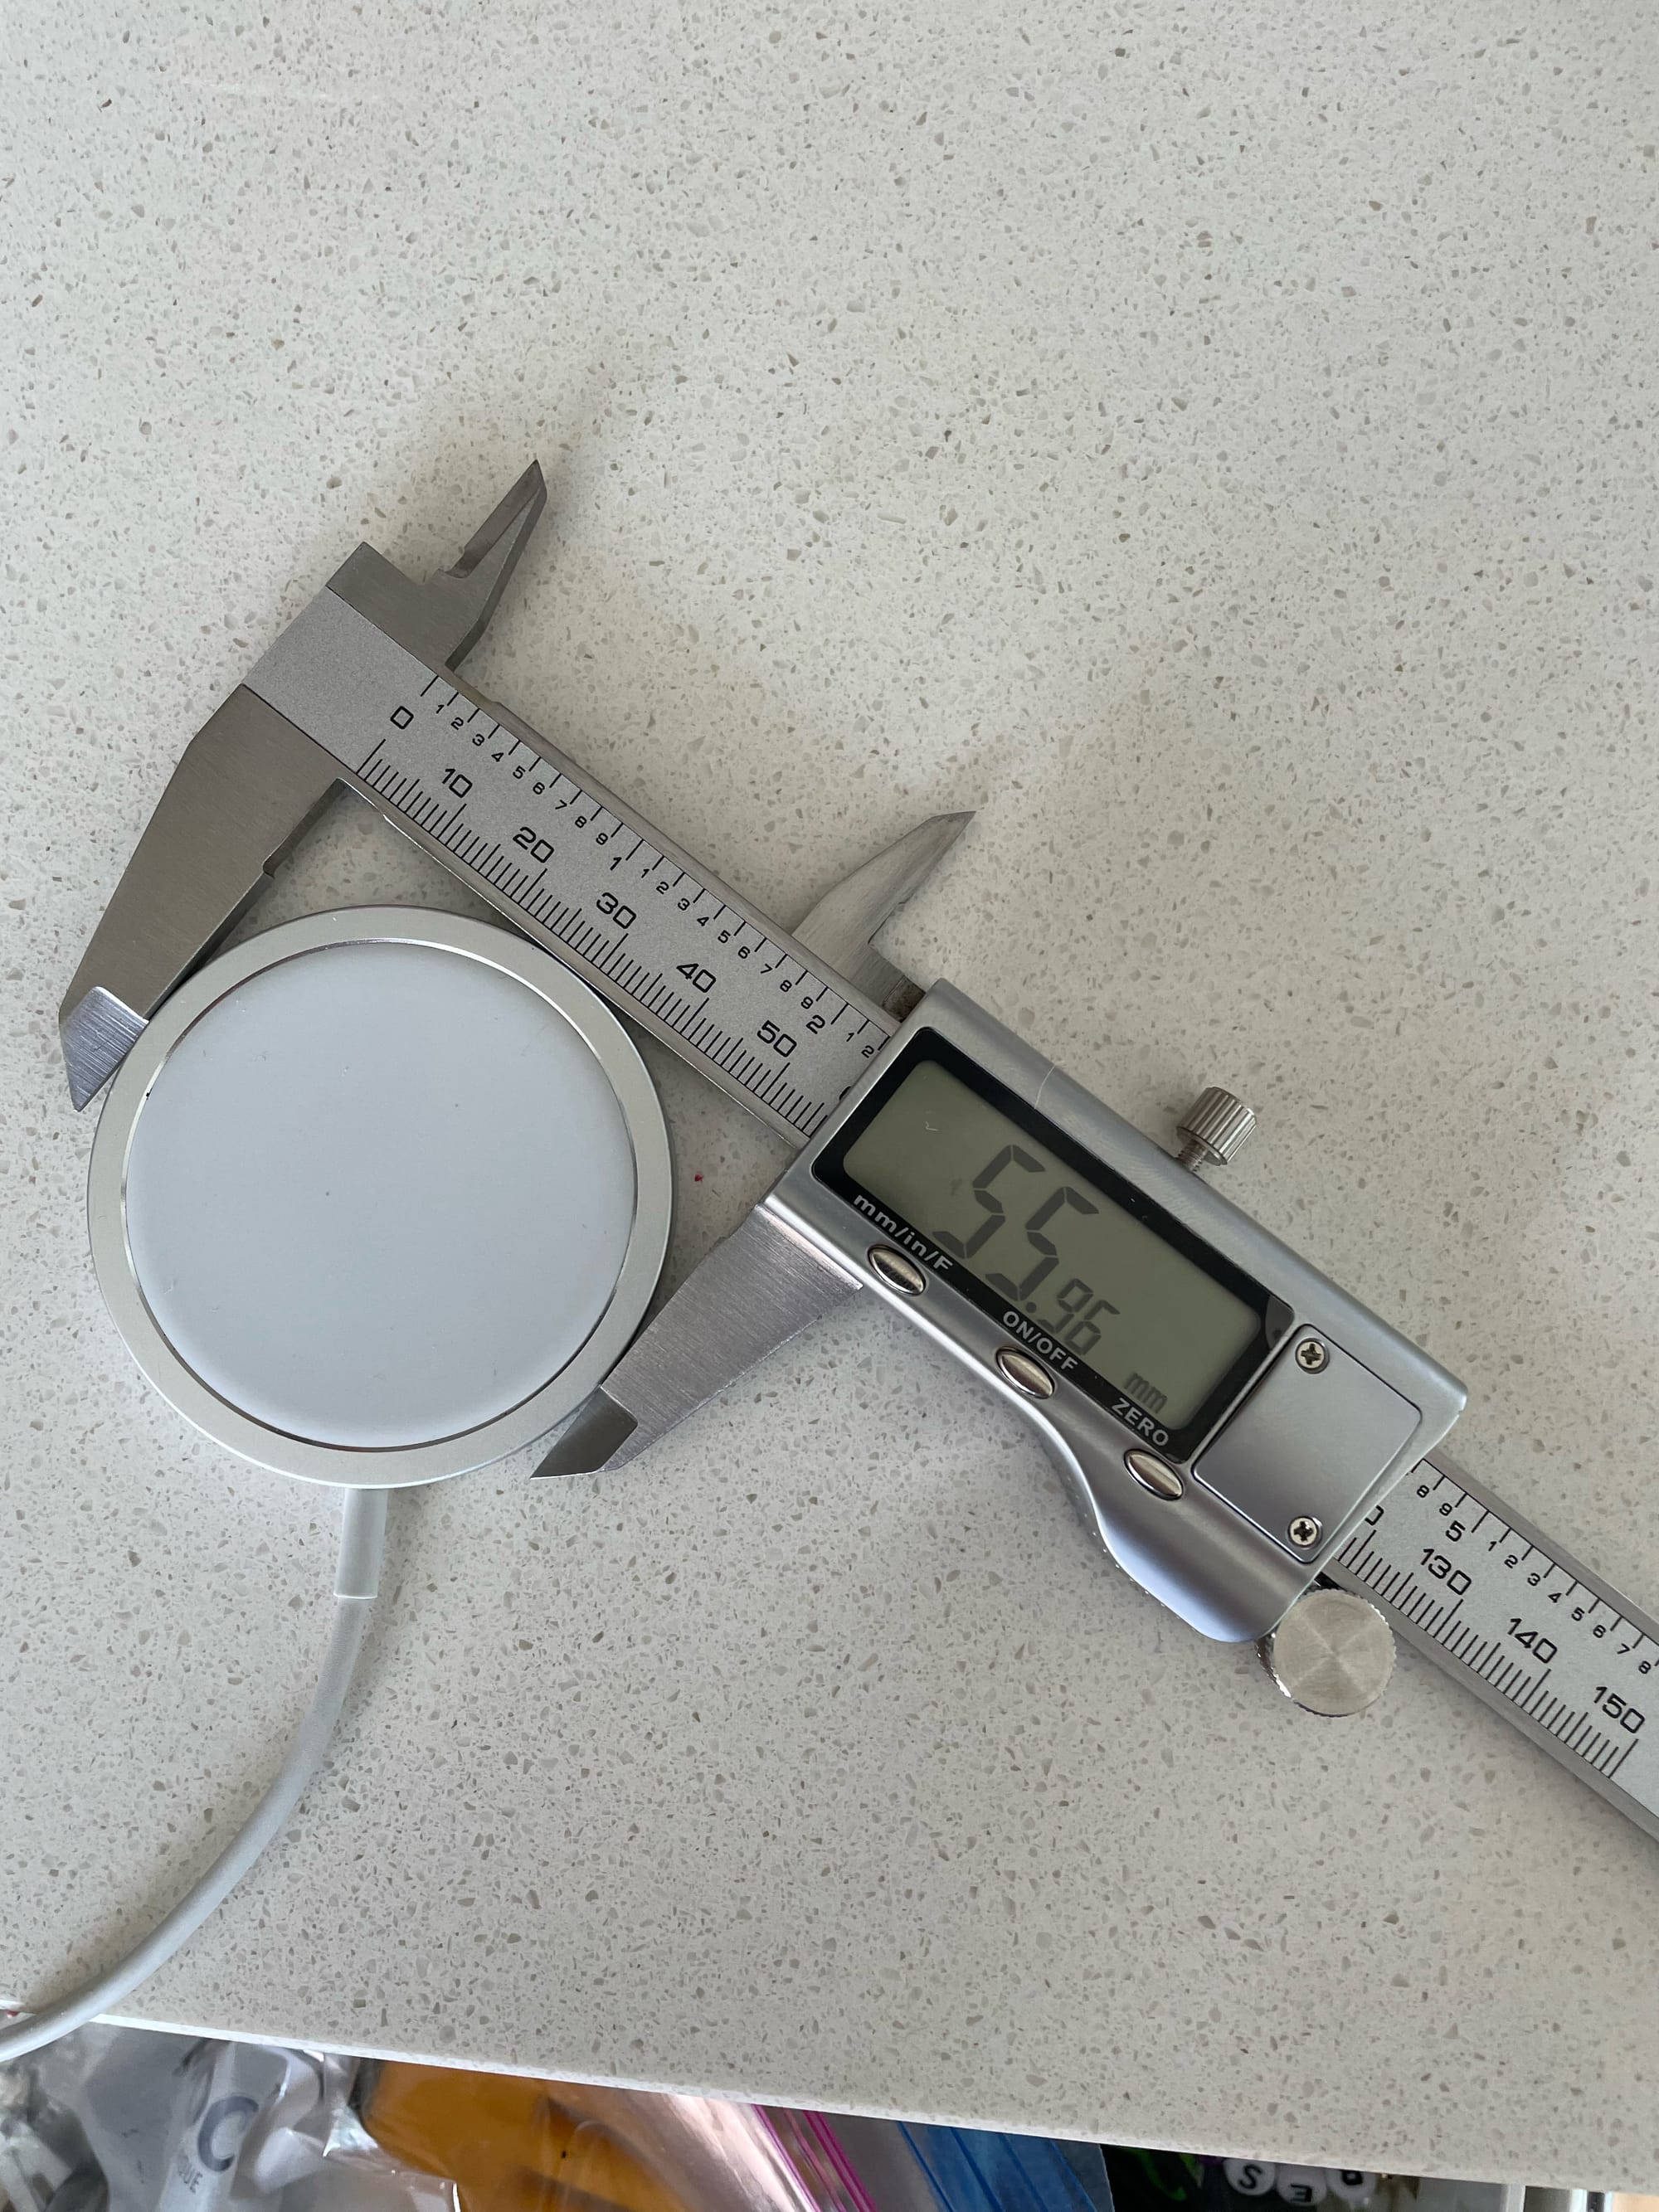
2) Measure twice cut once
I was so excited to see what the new design would look like, that I rushed things and didn’t get exact measurements right. I paid for this by having to reprint 2-3 more times than were necessary.
3) Understanding 3D printing and dimensions
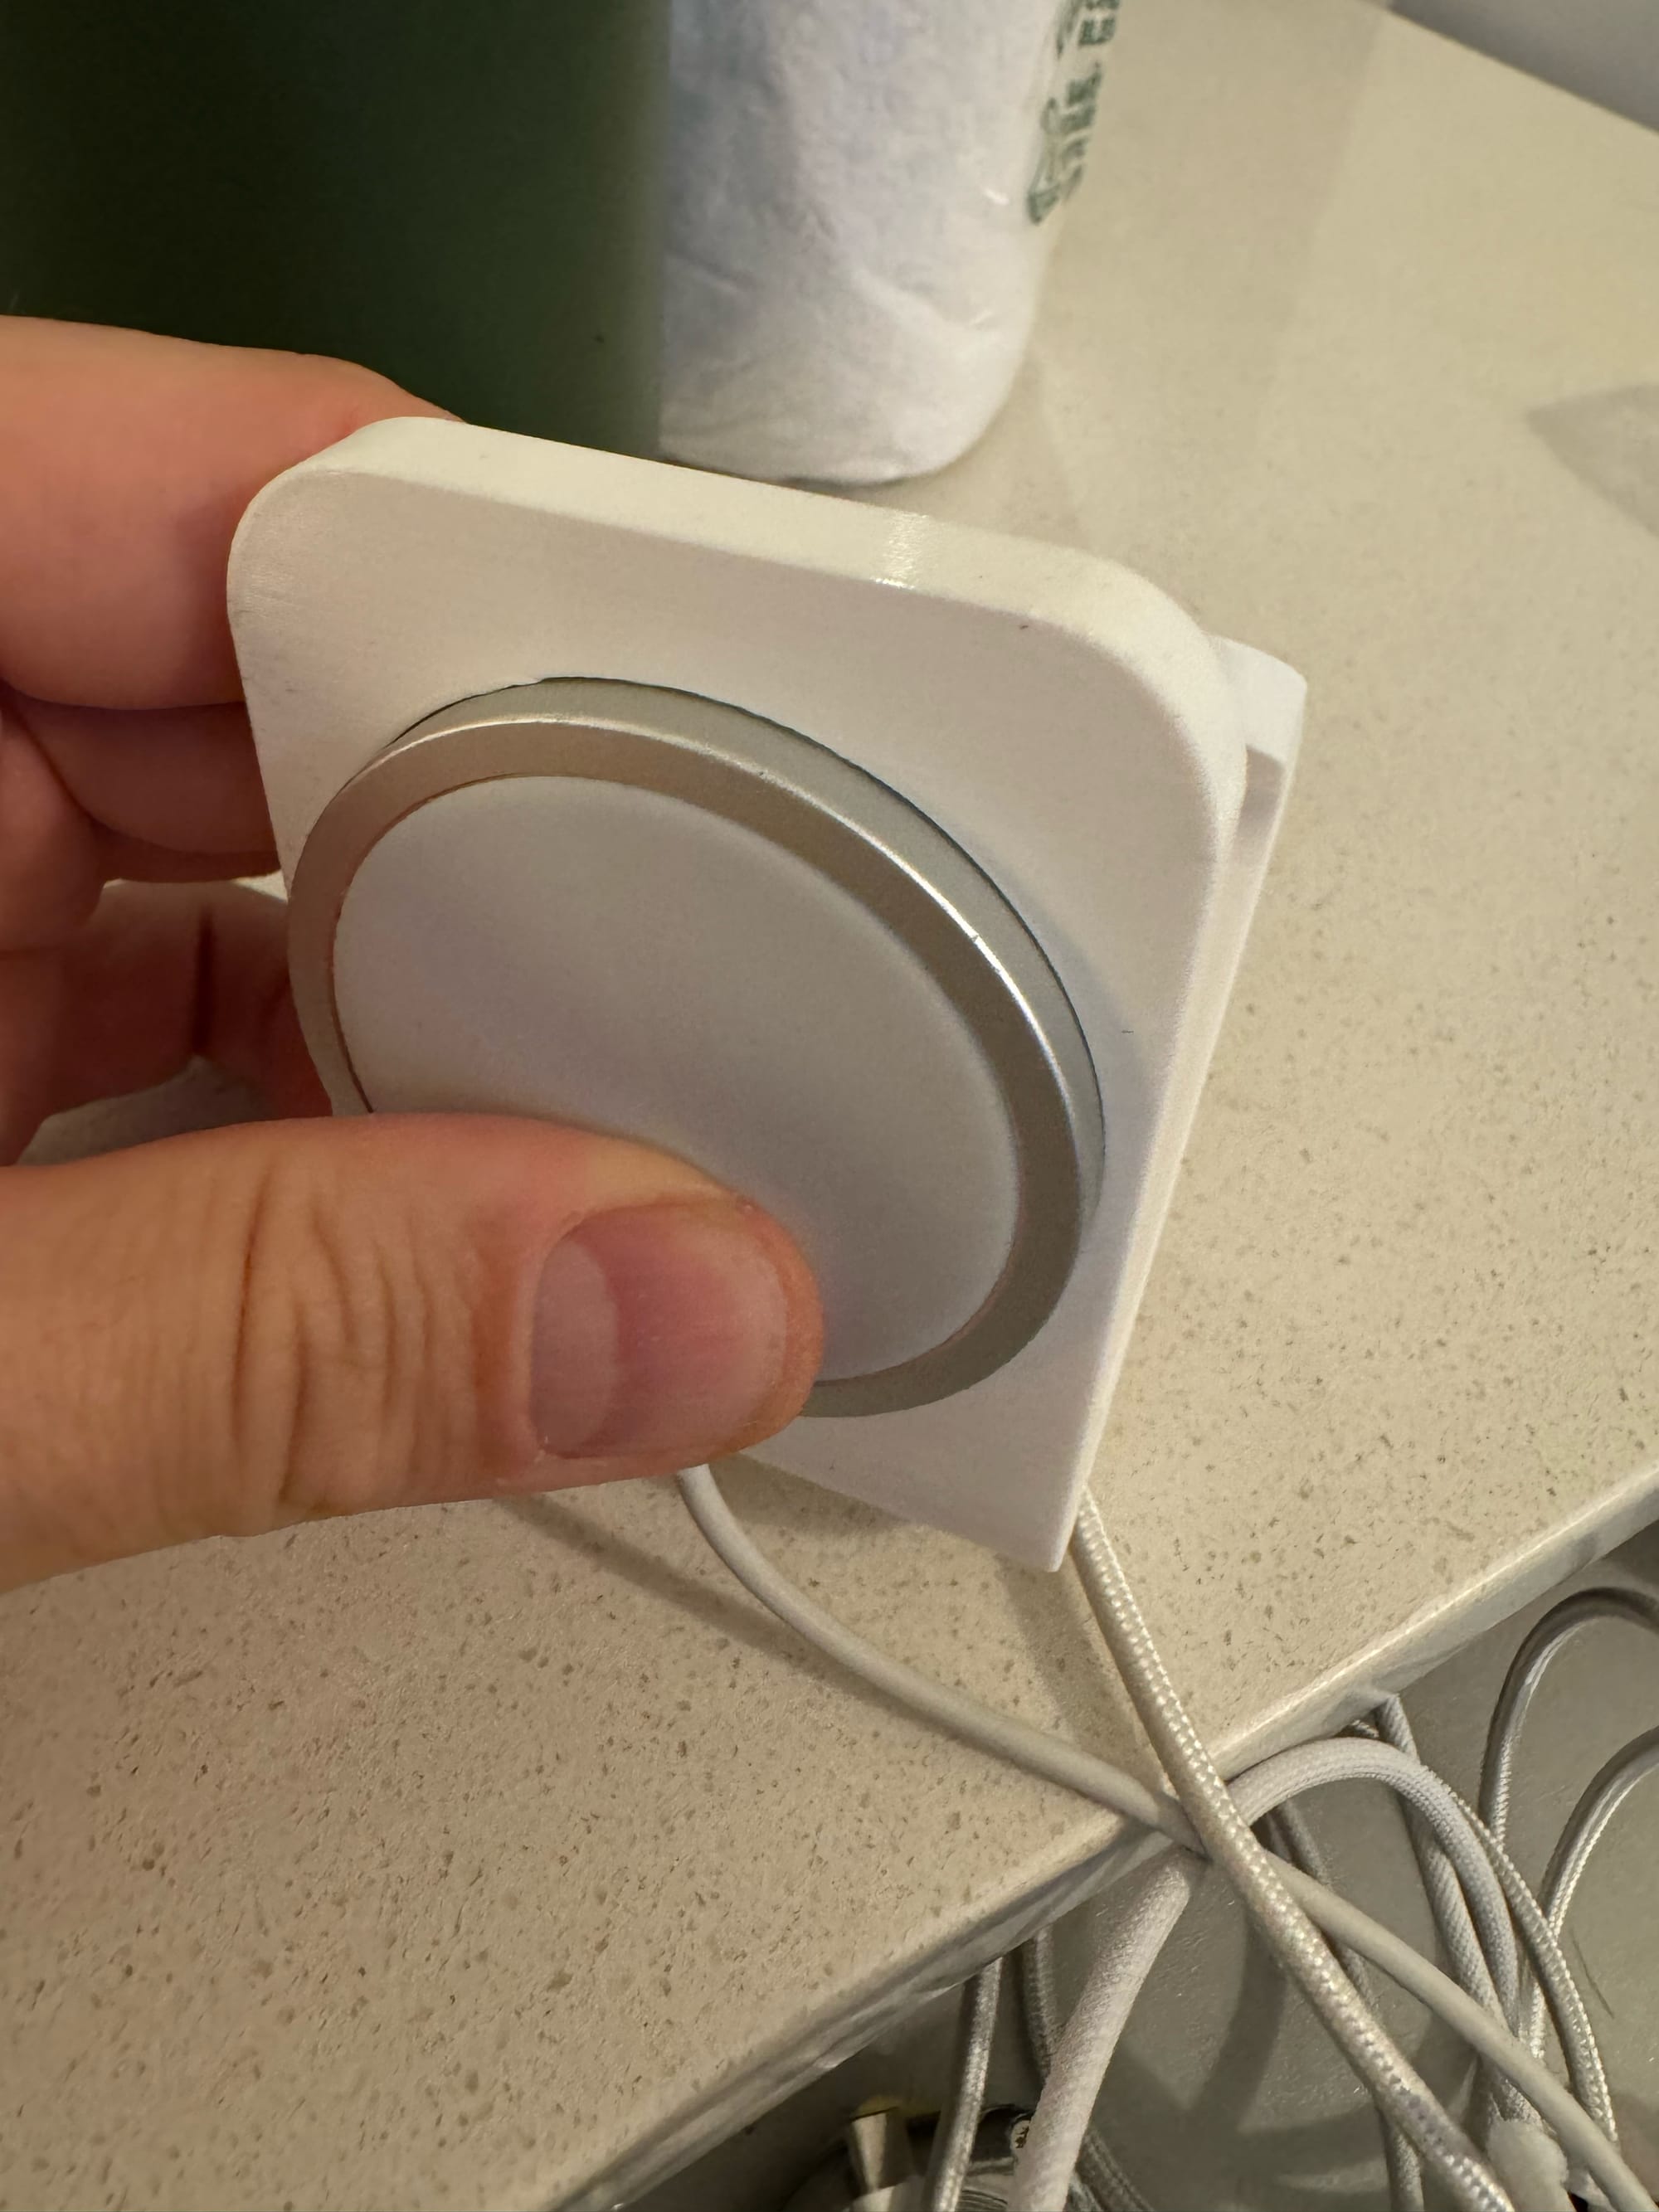
I still haven’t solved this problem. I’ve read that prints can shrink depending on the temperature outside, or that certain machines might not be calibrated correctly, and the dimensions can be off. Either way, I’ll have to try the design a few more times with new printers to see if I can resolve this final issue of the MagSafe pucks not fitting.
4) Use version numbers in your file names AND on your physical prints
Once I got to the point where I had 3-4 print files and matching physical 3D prints… it became impossible to remember which one was which. Going forward, I’ll label each print file clearly, and then I’ll write on the physical print the same version number.
Summary
In finally got some calipers and worked with the designer to get the puck dimensions right. It still took two more iterations of printing, so it boosted my total cost, but I was thrilled to have everything finalized and working.
I was blown away about the experience of making something with a 3D printer, and now I’m addicted, so I’ll be trying it again soon. If I had a larger apartment, and didn’t need to be concerned about the fumes from a 3D printer, I’d be printing things all day every day!
Here's the STL if you want to make the magsafe dock.